Axis Snap
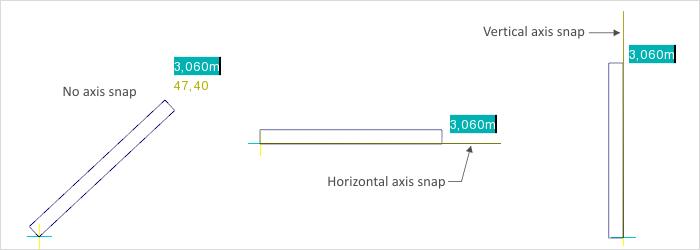
The idea with snapping an axis is that objects can “grab” an axis emanating from a UCS reference point while they are being edited. As soon as the cursor is brought onto the intersection between the horizontal and the vertical axis while an object is being drawn or moved or otherwise manipulated, the axes will become visible and the object can then be lined up as desired. Three demonstrations are shown here of the use of Axis Snap. They take you through how a wall can be drawn viewed from above. Axis Snap happens while you are drawing, when you get close enough to the intersection with the horizontal (or vertical) axis.
There follow two examples of the use of Axis Snap.
1. Using Axis Snap to Help Draw a Wall
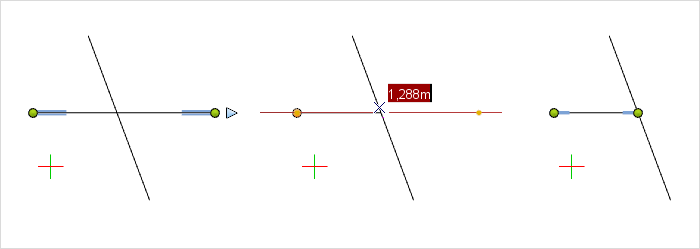
2. Axis Snap to Help Shorten a Line Using a Second Line
In this instance, Axis Snap is used in shortening one of two intersecting lines so that it ends exactly at their intersection.
Locking an Axis
While editing the object, you can lock the axis on which you want to align the object by either using the context menu or pressing the Shift key. For example, say you only want to move an object vertically and have selected Lock Axis, any horizontal movements of the mouse will have no effect. Pressing the Shift key again or using the context menu item Unlock Axis will free up the cursor.
Deactivating Axis Snap
As it does not always make sense to use Axis Snap for aligning objects, you can switch off this feature at any time. Move the mouse to an axis and select Disable Axis Snap from the context menu. As an alternative, press G. Pressing G a second time or Enable Axis Snap in the context menu reactivates Axis Snap.