Dimension Styles
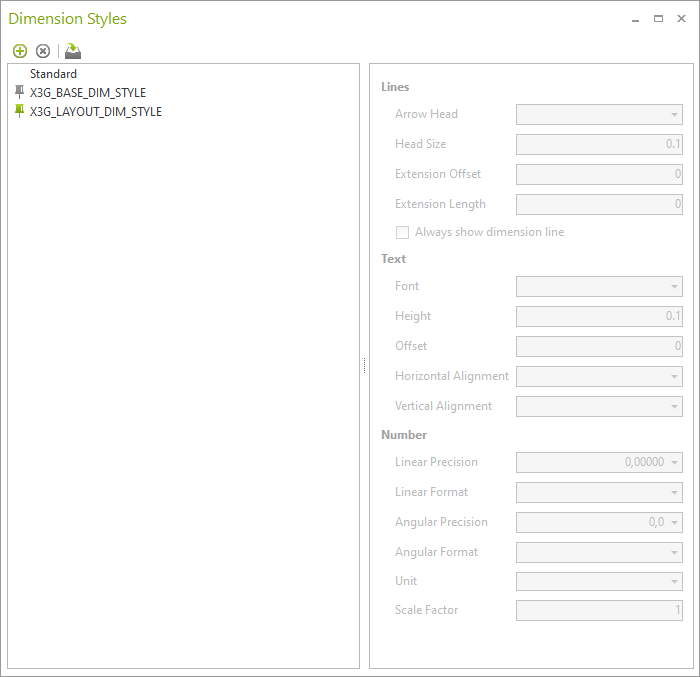
The Dimension Styles dialog, opened by clicking on the button of the same name in the Dimension group, Edit tab, offers the possibility of customizing the appearance of the dimension markings in the plan and all future dimensions using the edited stile.
Besides the styles loaded from the DWG, the dialog will always make three styles available (Standard, X3G_DEFAULT_DIM_STYLE and X3G_LAYOUT_DIM_STYLE).
The Dialog Permits Styles:
•to have their properties edited
•to be newly created
•to be removed
•to be set as default
Setting Dimension Styles
In the Dimension Styles drop-down menu, you can see all of the styles that apply to the currently opened plan. Left clicking on the empty space in front of a style, double clicking or pressing Enter will make it the default: All of the subsequent dimensions will then have this style.
Dimensions that have already been set within the plan can be changed using the Properties Editor. To do so, choose the dimensions using (multi) selection.
Importing Dimension Styles
You can easily transfer your Dimension Styles to other plans. Click on the Import button in the Dimension Styles dialog and select a DWG from your file system. All styles included in this DWG will then be inserted into your current plan and can be used for further planning.
Separate Dimension Styles for Planning and Layout Area
The dimension style is selected separately in the design and layout areas.
The unit of measurement is based on
•Planning area: the insert unit of the drawing (Application menu, Document Settings, Settings tab)
•Layout area: Length Unit (Layout Settings, Operation tab)
Due to the differing units, the styles should usually only be used in one of the areas. Therefore, separate dimension styles must be defined for the planning and the layout area.
Two appropriate styles are predefined accordingly:
•X3G_BASE_DIM_STYLE - planning area
•X3G_Layout_DIM_STYLE - layout area