Glass Fronts
The Glass Front tool is to be found in the Wall Elements section. A glass front is inserted as follows.
|
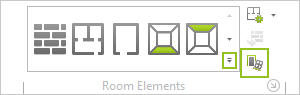
1.Switch to the Room group, Start tab and click on the arrow circled in red in the image on the left. The best projection to use for these insertions is Top. 2.Click once to establish the starting point of the glass front in the wall. |
|
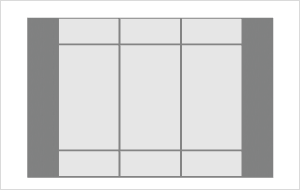
3.Click once to establish the starting point of the glass front in the wall. 4.Move the mouse or enter figures with the keyboard to set the width. 5.To conclude the operation, click a second time or confirm the figures entered with Enter. |
To insert yet another wall element, simply press the F2 function key.
Editing a Glass Front
The various properties for glass front and how to adapt them are listed in the following table.
Properties of glass front |
Can be edited by means of |
Height (overall) |
Dimension figure on the object, Properties Editor, Interactor |
Width (overall) |
Dimension figure on the object, Properties Editor, Interactors |
Parapet |
Dimension figure on the object, Properties Editor |
Center Offset |
Dimension figure on the object, Properties Editor |
Column Count |
Object, Properties Editor |
Column Width |
Object, Properties Editor |
Segment width |
Interactor |
Segment height (only for multiple rows) |
Interactor |
Row count |
Properties Editor |
Position |
Interactor |
Lateral distance from neighboring objects |
Dimension figure on the object |
Parapet |
Dimension figure on the object, Properties Editor |
Vertical Bars |
Properties Editor |
Frame |
Properties Editor |
Name |
Properties Editor |
Whether dimensions and interactors are visible will always depend on the projection selected. The height of a glass front can, for example, not be set in the Top view by entering values or using an interactor.