Pillar
One of the Additionals that you can plan from the room elements link is pillar. The types of pillar which can be created are round or square.
Creating a Pillar
1.Change over to the Room Elements group, Start tab, and open the menu by clicking on the downward pointing arrow. 2.Now click on Pillar. 3.Go into the viewport and click to establish the start point for the pillar. 4.Move the mouse or use the keyboard to set the lenght and width of the pillar. The height is preset and can be changed if necessary once the drawing procedure has ended. 5.The pillar will be fixed if you click the mouse again or use Enter to confirm the values typed in. |
Editing a Pillar
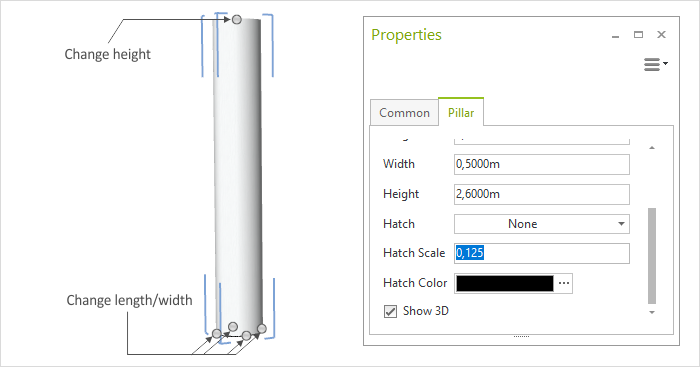
Pillar properties |
Description |
Can be edited by means of |
|---|---|---|
Height |
Height of Pillar |
Properties Editor, Interactor |
Width/Length |
Width/Length of Pillar |
Properties Editor, Interactors |
Type |
Toggle between Round and Square pillar |
Properties Editor |
Hatch
|
Selection from a number of hatching patterns. Hatch becomes visible as soon as 3D rendering is disabled |
Properties Editor |
Hatch Scale |
Sets the scale of the hatch |
Properties Editor |
Hatch Color |
Sets the color of the hatch |
Properties Editor |
Show 3D |
Enables/disables 3D rendering of the pillar |
Properties Editor |
Name |
It is possible to give a pillar a Name |
Properties Editor |