Tape Measure
The Tape Measure tool enables certain distances to be measured in the course of planning without leaving behind any marked dimensions, as would be the case if the tools for rotated or angular dimensioning were used. The distances measured with the Tape Measure are copied to the clipboard.
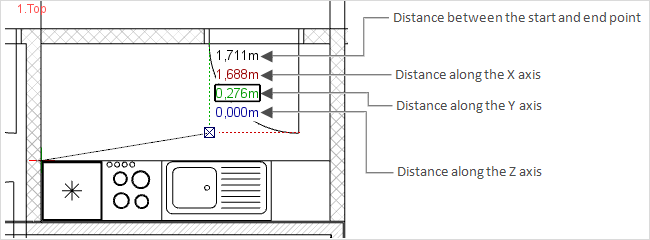
The tape shows not only the distance between the start and finish points but also the corresponding distances along the x, y and z axes (see following screenshot).
This is how to use the tool:
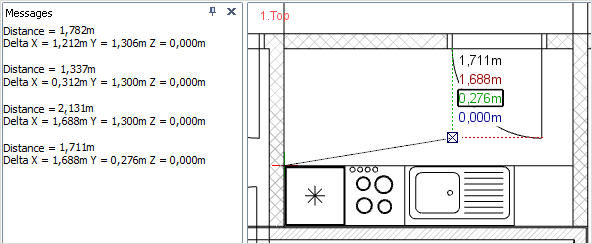
1.Click on the Tape Measure item in the Dimensioning group, Edit tab. 2.Click to define the start point of the measurement. 3.Use the mouse to move along the line in the desired direction. 4.Now click the left mouse button again to fix the endpoint of the line to be measured. Optional: 5.To show the measurement in your drawing, press Ctrl+V in combination. 6.The text that appears near the cursor can be positioned wherever you wish. Just move the cursor and then click to confirm the position. An Additional Function in pCon.planner Pro In the PRO version, a list of all the values calculated with Tape Measure can be recorded. The message window has to open or docked for the purpose. Use the Messages command on the Articles tab to open the message window and then start the measurement.
The values listed in the window can be copied (Ctrl+C) and can be inserted (Ctrl+V) into the new window when other operations and tools are being run. |