Windows
The Wall Elements group includes windows, which can be inserted into a wall.
|
1.Room group, Start tab: click on the arrow marked in green in the image on the left. The best projection to use for these insertions is Top. 2.Clicking on the arrow opens a menu (see here) offering different windows to be selected with a click of the mouse. |
|
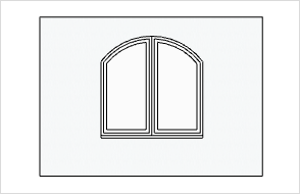
3.The window must now be inserted into a wall. To do this, move the mouse onto the desired wall and click where you wish to insert the window. 4.The left-hand shot is of an arched double Window which has been inserted into a wall. |

To insert yet another wall element, simply press the F2 function key.
Whether dimensions and interactors are visible will always depend on the projection selected. The Height of a window can, for example, not be set in the Top view by entering values or using an interactor.
Note: On our Youtube channel you will find a video on this topic |
||
|
|
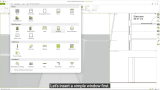
The floor plan has been correctly inserted and the walls have been traced - the next step is to insert windows, doors and other wall elements. In this video we will show you how to insert these elements correctly into your traced floor plan and what you should pay attention to. |
Editing a Window
Properties of windows |
Description |
Can be edited by means of |
Height |
Height of window. Any fanlight will make no difference to the overall Height. |
Dimension figure on the object, Properties Editor, Interactor |
Width |
Width of window |
Dimension figure on the object, Properties Editor, Interactors |
Parapet |
Distance of window from the lower edge of wall |
Dimension figure on the object, Properties Editor |
Center Offset |
Relocation of center axis |
Properties Editor |
Rooflight |
Window in roof of a building. Is set automatically while inserting window in Pitched Roof |
Properties Editor |
Jamb |
Adds a bevelled jamb to a rooflight |
Properties Editor |
Arched |
The window includes a rounded arch |
Properties Editor |
Arch Rise |
Sets the height of the arch for a window of this kind |
Properties Editor |
Position |
Alteration of position of window on wall |
Interactor |
Lateral distance from neighboring objects |
Distance from other wall elements or from end of wall |
Dimension figure on the object |
Segments |
It is possible to set the number of segments of which the window is to be composed. For each segment, the place where the handle is to be fixed can be set. |
Properties Editor |
Opening Angle |
Define a separate opening angle for every segment of the window. |
Properties Editor |
Transom Light |
If a fanlight has been enabled, its Height, its form, and number of segments and the position of its handle for opening can be edited. Fanlights have no effect on the overall height of the window. |
Properties Editor |
Opening direction |
Opening direction of window |
Interactor |
Tilted |
Windows are displayed as if tilted open |
Interactor |
Sill (not for Rooflight) |
Sills can be added to windows. The direction can be adjusted, an overhang at the front and/or side can be added. |
Properties Editor |
Glazing Bars |
On inside or outside, different types, number and width of bars |
Properties Editor |
Name |
A name can be given to each window |
Properties Editor |