Wall Dimensioning
There is a tool in the Dimensioning menu, (Dimensioning group, Edit tab) for automatic dimensioning of walls.
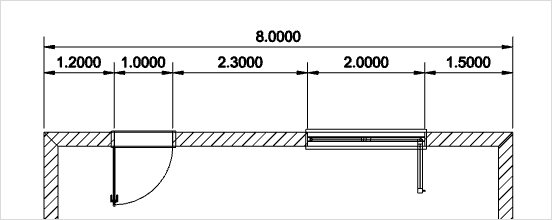
1.Click on the Wall Dimension button to start the tool. 2.Moving the cursor over a wall makes a blue line appear on its long outer edge. This is the signal that dimensioning can be carried out. 3.Click on one of the blue lines and move the mouse to set the distance between dimension marking and wall. Alternatively, enter the distance in figures and confirm with the Enter key. Step 4 will not then apply. 4.Another click and the actual dimensioning of the wall will be visible. |
The tool will stay active until you deactivate it using the Esc key or the Cancel context menu item.
Please note: Select Wall Dimension, press SHIFT and click on the wall at the same time, and you will see only the dimension for the wall length.