Extrude
Extrude Extrude Slanted |
Extrude to Point Extrude Nested Drawing Elements |
Note: On our Youtube channel you will find a video on this topic |
||
|
|
Logos are important ambassadors of a company and key to branding. With pCon.planner, you can easily convert your 2D logos or lettering into a 3D object and use it in your planning. |
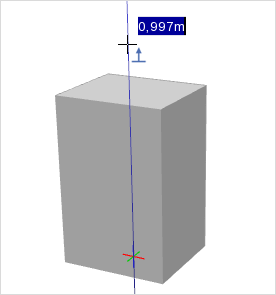
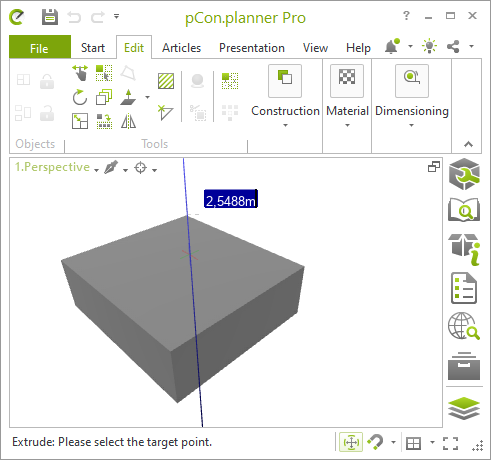
Extrude is the way of transforming closed two-dimensional shapes (surfaces) into three-dimensional bodies. You can use the tool for example to create cubes from squares or cylinders from circles.
|
1.Select the object to be extruded. 2.Click on the Extrude button in the Tools group, Edit tab, to start the extrude tool. 3.Change to Perspective view and move the mouse over the surface or the edge of the object. Now start the extrusion process with a click. 4.Move the mouse to control the direction of the extrusion. 5.Extrusion is finished by either a mouse click or entering concrete values. |
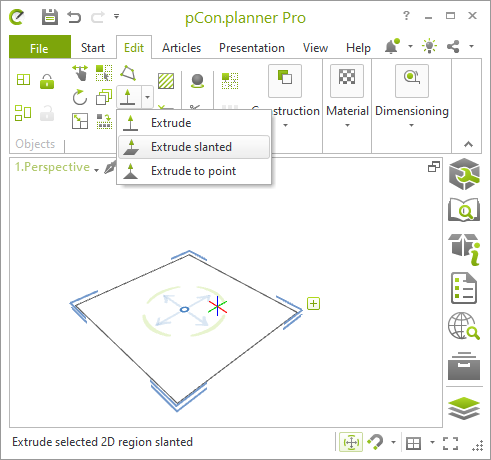
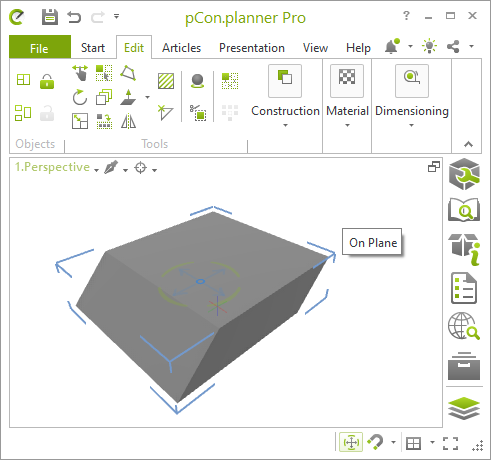
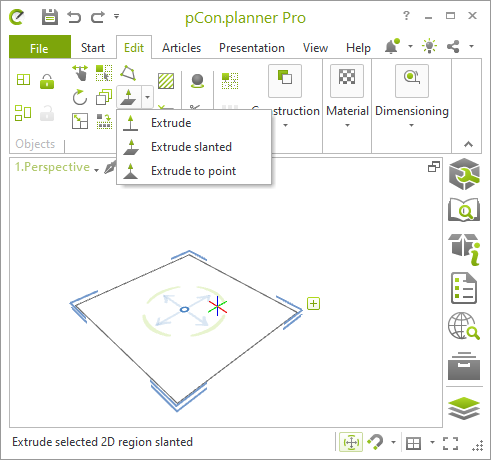
Extrude slanted creates an oblique 3D object. 1.Select a 2D drawing element (multiselection possible). 2.Select Extrude slanted from the drop-down menu (Extrude, Edit tab, Tools group).
|
|
3.As in the instruction above, define the height of the extrusion by moving your mouse or entering a value. 4.Confirm the height by clicking on the left mouse button or by pressing Enter. |
|
5.Define the slant by moving your mouse freely or by clicking on a point in your planning. |
|
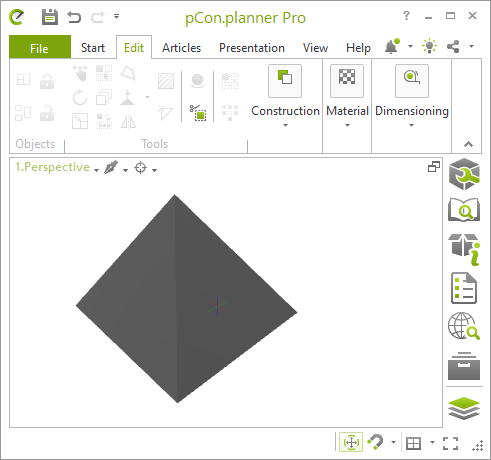
Extrude to point creates a 3D object tapering in one point. 1.Select a 2D drawing element (multiselection possible). 2.Select Extrude to point from the drop-down menu (Extrude, Edit tab, Tools group).
|
|
3.Click to define the point to which the 2D element is to be extruded. The point can be inside or outside the 2D element. 4.Pull the object to the desired height. 5.Define the slant by moving your mouse freely or by clicking on a point in your planning. |
|
Extrude Nested Drawing Elements
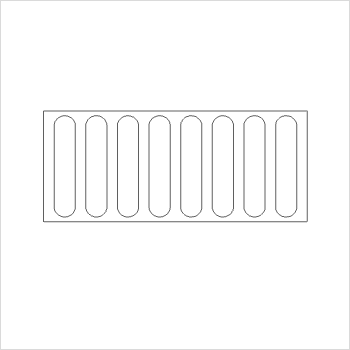
If one closed 2D shape is inside another, extrusion is also a possibility.
1.Use multiselection (i.e., hold down Ctrl and click all the objects) to mark the objects that are to be extruded.
2.Click on the Extrude button in the Tools group, Edit tab, to start the extrude tool.
3.Change over to Perspective and move the mouse over the surface or the edge of the object. Now start the extrusion process with a click.
4.Move the mouse to control the direction of the extrusion.
5.Extrusion is finished by either a mouse click or entering concrete values.
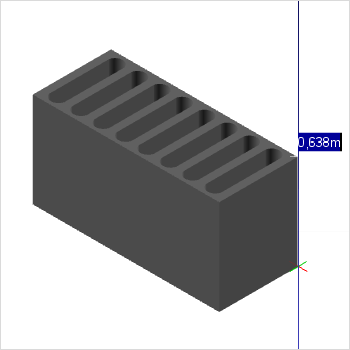
Enhanced extrusion means that the inner shape is deducted from the outer shape enclosing it. If closed drawing elements overlap and are subjected to the enhanced extrusion function, they will be united into one body.
Note: The operations Extrude slanted and Extrude to point can also be used on nested 2D elements. After starting the Extrude tool, you can access the Extrude Copy command from the context menu. This option keeps the original 2D shape in addition to the extruded object.
|
|