Pitched Roof

The Room Element Pitched Roof can be selected from the Room Elements category on the Start tab. In order to create a pitched roof, we recommend using four viewports, combining Front and Top view with two viewports using Perspective views.
Please note: For a correct representation of the pitched roof and of architectural elements added later, please always plan pitched roofs from their lower edge towards the tip of the roof.
Changing the projection while drawing a roof will not disrupt the drawing process.
In order to create a single roof element, you need to enter four values: Length, depth, base height and pitch.
1.Select the room element Pitched Roof. 2.Click in one of your viewports to set the starting point of your pitched roof. |
|
|
|
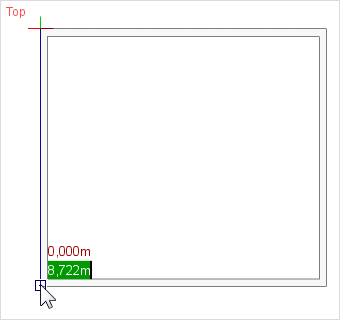
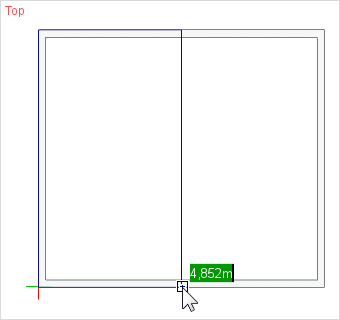
3.Use your Top view to set length and depth of the Pitched Roof. Move the mouse to adjust the desired direction or enter the values via your keyboard. |
The green value determins the length of the roof element. The red value defines the depth. Confirm your input by clicking the left mouse button or by hitting Enter. |
|
|
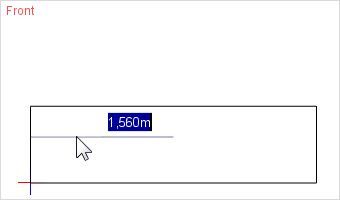
4.We recommend you using a Front view for setting base height and gradient. Axis snap and snap points will help you. |
In order to adjust height and gradient (the values marked in blue), please move the mouse or enter the values. Confirm with a click on the mouse or with Enter. |

If you want to draw another Pitched Roof, please press F2.
Editing a Pitched Roof with the Properties Editor
You can edit all properties of your Pitched Roof with the Properties Editor. The Properties Editor is also where you enter an offset for the sides or the lower edge of the roof.
Pitched Roof properties |
Can be edited by means of |
Length |
Dimension figure on the object, Properties Editor, interactor |
Depth |
Dimension figure on the object, Properties Editor, interactors |
Position |
Interactor |
Base Height |
Dimension figure on the object, Properties Editor, interactor |
Rise |
Properties Editor, interactor |
Angle |
Properties Editor, interactor |
Thickness |
Properties Editor |
Offset |
Properties Editor |
Name |
Properties Editor |
Please note: Your Wall Elements will automatically adapt to the roof: If a Pitched Roof cuts through a wall, the height of the wall will be adjusted to its intersection with the roof. We recommend that you move the walls up by the wall height by holding down the Ctrl key. This way you can duplicate them and avoid problems when assigning textures and materials.
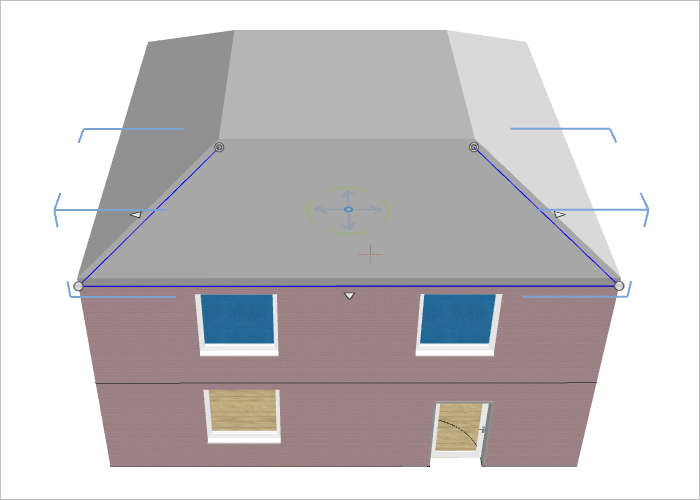
Editing Roof Elements by their Interactors
Interactors are a way to create more complex roof types like tented roofs or cornered roofs.
Combine the single roof elements by altering their form. With a click on the plus symbol of an element, you open its edit mode. Move the edges of the roof element by clicking the circular interactors and moving them to the intersection with another roof element. This will help you constructing individual roof types from the single elements.
Examples for Roof Constructions
In the following we will present you with three different examples of the construction of roofs.
Pointed roof
To create a simple pointed roof, proceed as follows:
1.Draw a single Pitched Roof element whose depth reaches to the middle of the room. Use the guiding lines and snap points of pCon.planner (active by default) to snap automatically at the middle of the room underneath the roof.
2.Select the roof element and click the Mirror feature (Edit tab).
3.Select the inner center (mirror point) of the roof element and rotate it by 180. Press Ctrl in order to duplicate the element and confirm the position of the new element with a click on the mouse or with Enter.
Tented Roof
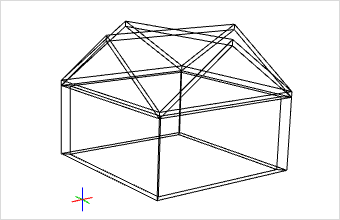
A second example is the creation of a tented roof from two intersecting ponted roofs. Proceed as follows:
Switch to the Wireframe mode (View tab, Render group).
|
|
1.Draw two crossing pointed roofs (each consisting of two Pitched Roofs). Make sure that all roof pitches are the same height. |
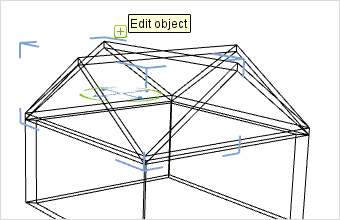
2.Select the first Pitched Roof. The edit symbol will become visible. Click it to activate the interactors. |
|
|
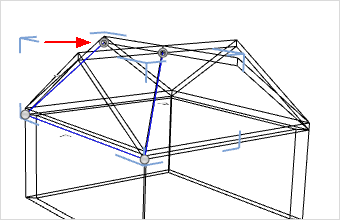
3.Click on the Interactor of the roofline of the upper side and drag it to the intersection of both pointed roofs to change the shape of the Pitched Roof. |
4.Repeat this for both sides of every Pitched Roof. The result is a tented roof with four pitches that converge to one point. |
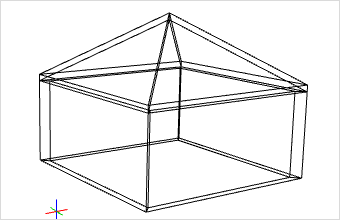
Mansard Roof
For a mansard roof, add another roof element with the 0° lead angle to the tented roof at the desired height. Then use the circular interactors to pull the roof ends into position on all sides.
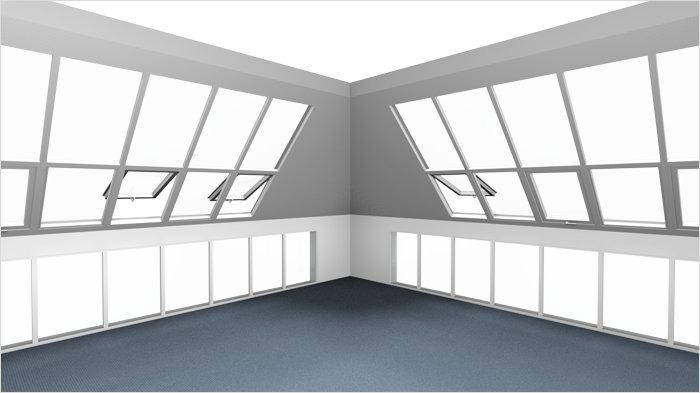
Further Pitched Roof variations
The image gives an example of how varied the Pitched Roof can be and how, for instance, it can be furnished with windows or glass fronts. Another feature which can be inserted is one or more dormers. Here is where to find out more about dormers and how they are edited.