Media Browser
Note: On our Youtube channel you will find a video on this topic |
||
|
|
No matter if it's 3D models, materials, or images – with the Media Browser, you can store your most important files directly in pCon.planner and insert them into your designs with just one click. In this video, we show you how to save planning data in the Media Browser and reuse it whenever needed. |

The Media Browser enables easy management of a variety of media relevant to this software. It is based on the principles behind Windows Explorer and is a tool that provides an interface between the pCon.planner design application and the directory structure of the operating system. You can create your own directory structure and organize your media any way you like. The Media Browser gives you access to your local hard drives, network shares, online storage etc.
To open it, click on the Media Browser button on the Toolbar. As with any other dialog, it can be docked or left floating.
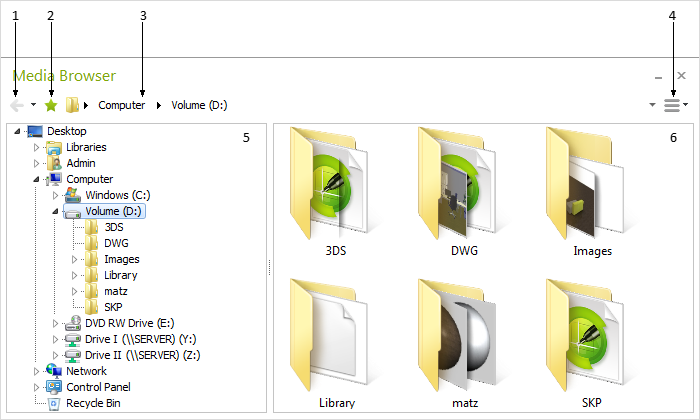
1 |
The arrows < > are used to navigate between the directories. |
2 |
Clicking the downward pointing arrow calls up the most recently used storage locations. |
3 |
Use the arrow pointing upwards to navigate to the next higher level in the folder structure. |
4 |
Display of the current path. |
5 |
Click on this area to open a menu. There you will find commands such as New folder or image-to-video conversion (Create video). You can also control the view of the file structure here (list, icons, details...). |
6 |
The left-hand pane can be used for navigating through the directories of the system. |
7 |
The right-hand pane shows the contents of the directory selected on the left. The only types of file displayed will be those supported by pCon.planner. |
If you want to change the view in the right-hand pane of the Media Browser, scroll the mouse wheel and press Ctrl at the same time.
Administering Favorites in the Media Browser
|
With the 'star’ icon in the toolbar of the Media Browser you can change between the tree (or outline) view and the Favorites display. Favorites can be created using Drag&Drop from the right-hand detailed display to get the directories or files into the Favorites window. The Favorites will automatically be put into alphabetical order. They can be renamed by a click on the corresponding entry within the menu (cog wheel symbol) or, using the Del key, they can be deleted. |
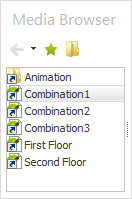
A double click enables the Favorites to be used. A file will be added to the design which is open. If the double click is on a folder, the folder will be opened and its files shown in the detailed display.
All file formats will be displayed in the Media Browser which can be opened and imported into pCon.planner. There is an overview in the sections Insert object/Open.
The possibility of moving different types of files back and forth makes the creation of libraries for rendering, material and geometry quick and easy. The library content can then be reused in new designs.
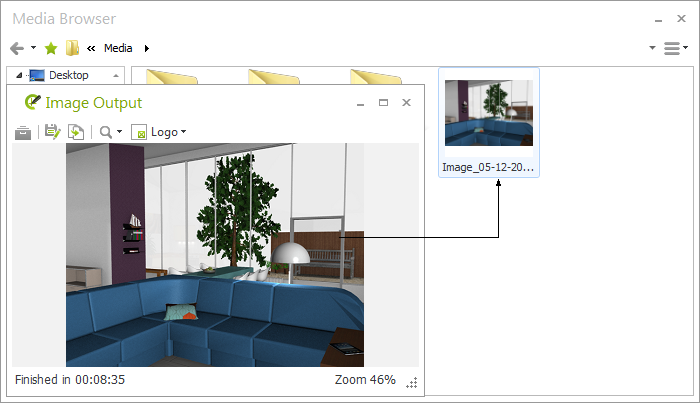
The images rendered with the Image dialog are displayed in an Image Output window once the computation process is complete. There, they can be moved with the mouse after they have been selected with a click (see next screenshot).
Besides using Drag&Drop, you can use the Copy Image button (on the Start tab, Copy menu) to create an image of the active projection. Then a click on the cog wheel and selection of the Media Browser item Insert from Clipboard will save that image.
When dragging images from the Media Browser into the design, there are two options available for image processing purposes. If an image is dragged directly onto an object, it will be assigned as a texture. For an image to be treated as a separate object, it must be moved into an empty area of the design. When the mouse is released, the cursor will change appearance and then the image can be moved around as such.
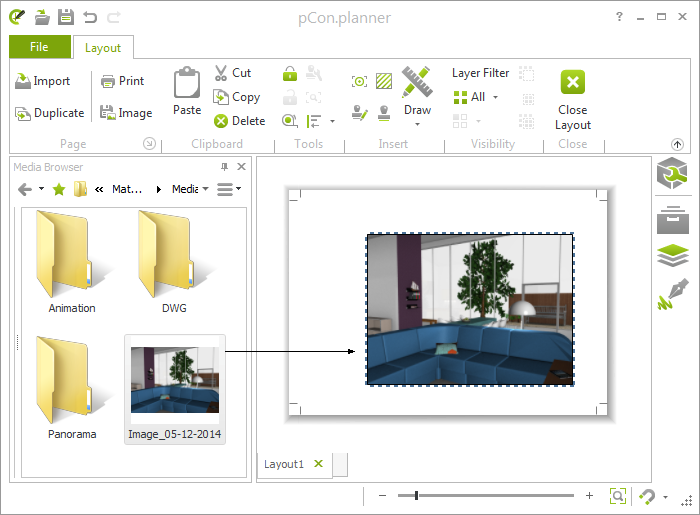
It is also possible to insert images using Drag&Drop in the Layout Area, and it does not matter whether this is from the Media Browser or the Image Output that appears after the rendering process.
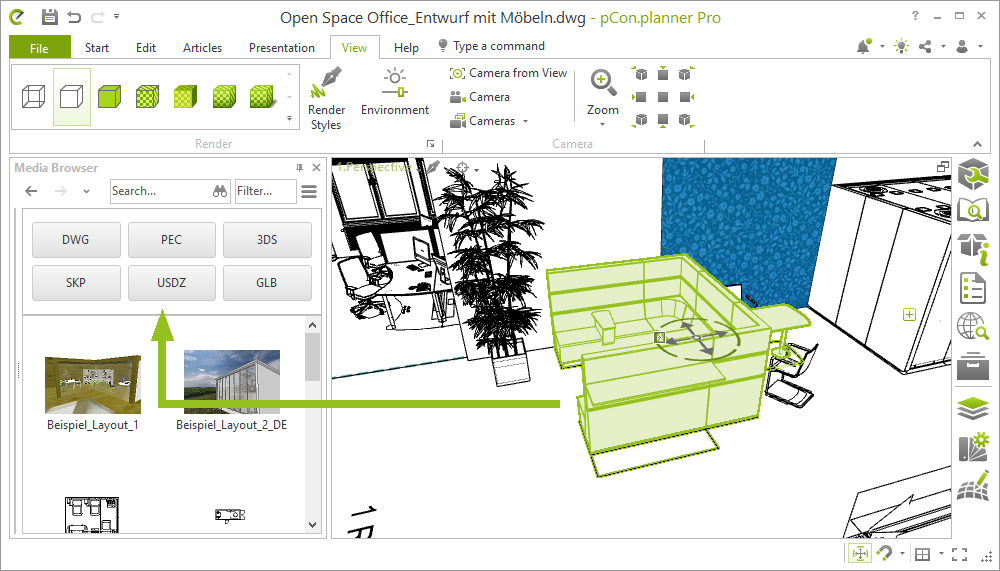
It is possible to use Drag&Drop to take individual objects or groups of objects out of the design and into the Media Browser, saving them there in different formats.
1.Select the objects in the design which are to be dragged into Media Browser. 2.Click on an object in the selection, hold the mouse button down and drag the whole selection into the Media Browser. As the screenshot shows, there are drop zones for the formats, e.g. DWG and 3DS, in the right-hand content window of the browser. 3.Release the mouse button when above the desired format. If none of the drop zones is used, the selected object will be saved in DWG format. 4.To complete the save, name the file or confirm the suggested name by hitting Enter. |