Text Editor

The Text Editor allows you to design or import formatted and illustrated text. It is located on the Start tab, Drawing Elements group. The text editor is also available in the Layout area.
Note: If you want to edit text objects designed with the text editor in other CAD programs, simply ungroup them there.
Open the Text Editor to write a text. The user interface of the text editor is based on familiar writing software. Among other things, the following functions are available:
Font |
Font type Font size Font color Clear format |
Paragraph |
Numbering and bullet lists Indents, line and page breaks Text alignment |
Insert |
Tables Images Symbols |
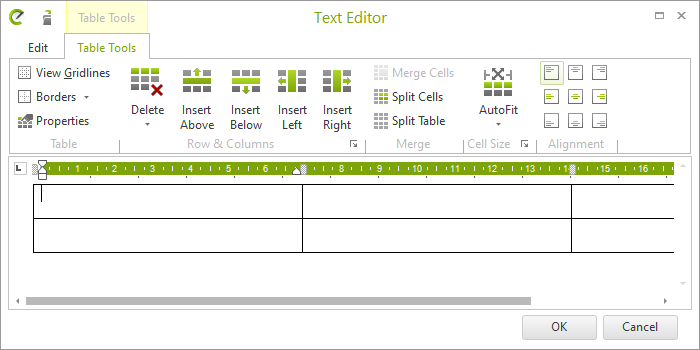
Tables can be inserted and edited in the Text Editor.
Click the Table button in the Text Editor to insert a table into your text. This opens another dialog where you can define the number of columns and the number of rows. The table will be inserted at the position in the text where your cursor is currently located.
Additional formatting options are available for tables. You can access these by clicking on the table you want to edit in the Text Editor window. This opens the dynamic tab Table Tools.
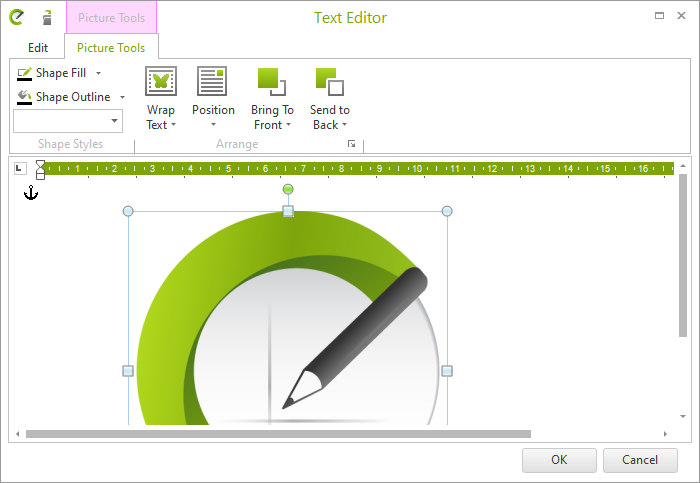
Images can be inserted and edited in the Text Editor. There are two options:
•Click the Picture button in the Text Editor: An image is inserted as a new paragraph at your cursor position.
•Click the Inline Picture button: An image is inserted into the current paragraph.
Additional formatting options are available for images. You can access these by clicking on the image you want to edit in the Text Editor to open the dynamic tab Picture Tools.
Inserting Text from the Text Editor into your Planning
After you have made all the changes you wanted to make to your text, click OK in the Text Editor. Your text is now attached to your cursor and can be inserted at the desired position in your planning with another click.
To edit a text placed in your planning with the Text Editor, select it and click on the pencil symbol at the upper right corner of the text. This opens the Text Editor, where you can make your changes. After confirming with OK, the text is displayed in the planning in its modified form.

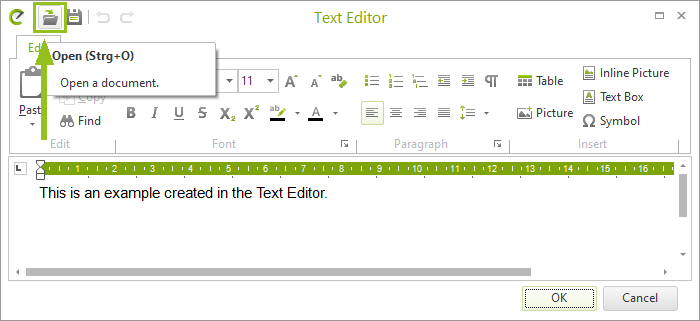
You can use the Text Editor to import the content of DOCX or RTF text files into your drawings:
1.1. Open the Text Editor.
2.2. Click the Open icon in the top left corner of the Text Editor (see following image).
3.3. In the import dialog, select the desired file and confirm by clicking Open.
4.4. The text will be opened in the Text Editor. There it can be edited and placed in your drawing (see Inserting text from the text editor into your planning).
Note: Only the first page of imported text documents will be displayed in your plannings.