Environment
Note: On our Youtube channel you will find a video on this topic |
||
|
|
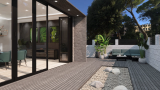
Use panoramic background images to give your renderings a more realistic look. In this video, we'll show you how to download panoramic images for free and add them to your design with just one click. Use the sliders to adjust the aperture angle and rotation until the background matches the selected perspective. |
|
|
With the right ambient lighting, you can harmonize light and shadow with your background, creating a realistic and cohesive atmosphere. In this video tutorial, we show you how to enhance your designs in pCon.planner through proper ambient lighting. |

The dialog Environment can be found under the View tab in the group Render.
With this dialog, you can control the ambience of your drawing: Background and global lighting.
The settings from this dialog will be shown in real time and automatically saved with the drawing file.
The Set as Default button will save the settings from this dialog as default settings for new plans.
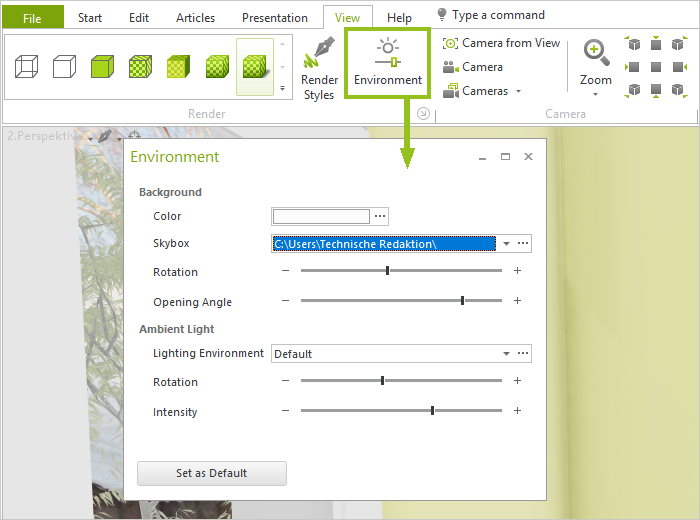
This is where you set a background color or select a skybox for your planning.
Assign a background color for the 2D displays as well as the orthographic and isometric projections.
The Skybox is visible in all Render Modes. It is displayed in perspective and orthographic projections.
Skybox
Option |
Background |
Off |
The background will be shown as the color set above. |
Default |
The Default Background (slightly cloudy sky) will be used. |
Custom |
A user-defined background will be used. Click on the 3 dots on the right side (see image below). Then, select a background from your local file system. |
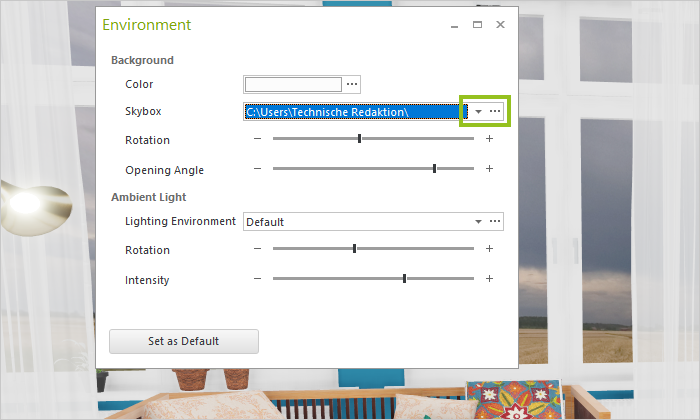
User-defined Background
For a custom background, load a spherical panorama with an aspect ratio of 1:2 into your plan. Please ensure that the resolution of the panoramic image is as high-quality as possible.
For the user-defined background, provide the following settings:
•Rotation – Set the horizontal orientation of the panoramic background
•Opening Angle – Set the height for the section of the image that you would like to see in the background. A smaller opening angle makes the background appear visually closer. A larger opening angle makes it appear more distant.
Note: Your background settings will automatically be used for rendering with OSPRay.
Ambient Light evenly illuminates your plan. It has a positive effect on the quality of your renderings.
In real time view, Ambient Light operates in both the Shaded and Realistic render modes. It is also active in render styles that are based on these two render modes. In the illustration, you can see a scene set using the render mode Realistic.
Option |
Background |
Default |
Enables pCon.planner’s default ambient lighting. |
Custom |
A user-defined image will be used for the lighting. The specific light color and mood will be used for the plan. Click on the three dots to the right (see image below). Then, select a background image from your local file system. We highly recommend using an HDRI image (High Dynamic Range Image) for the light source. Best would be a spherical panorama with an aspect ratio of 1:2. It is possible, however, to use other images. |

If needed, you can set the Rotation and Intensity of the Ambient Light.
Your settings for Ambient Light will automatically be used for rendering with OSPRay.
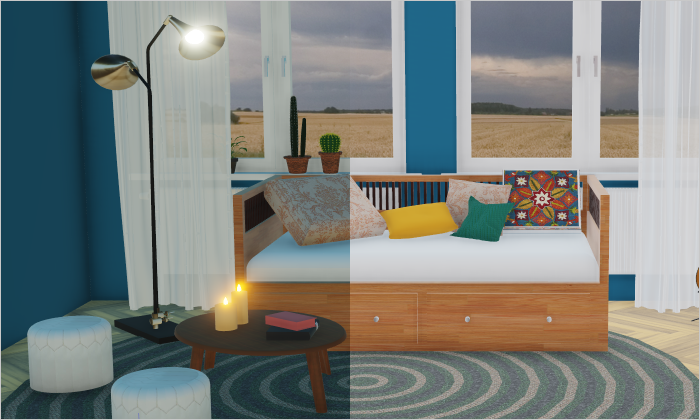
Images as Lighting Environments: Left side sunset, intensity 60%; Right side daylight, intensity: 100%
In addition to the Ambient Light, you can add sunlight if necessary. This is a light from a certain direction, which simulates the light and shadow conditions on a sunny day.
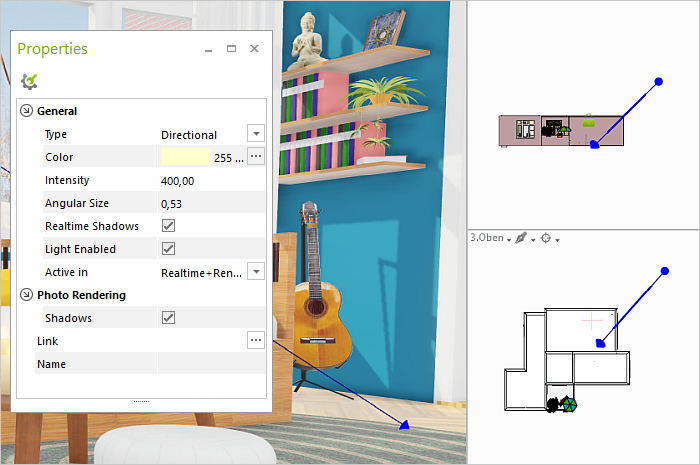
As sunlight, insert a Directional Light (Start tab, group Room Elements). Align this in your planning as desired.
Activate the Realtime Shadows option in the Properties Editor for the directional light source. We recommend activating the Realtime Shadows option only for rendering images. To sustain the optimal performance, please keep Realtime Shadows deactivated during the planning process.
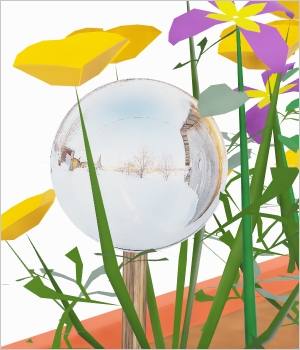
The behavior of reflecting surfaces - for example of mirrors - in the pCon.planner real-time view differs from the behavior of mirrors in the real world. There are five scenarios, depending on the settings used in the Environment dialog:
|
|
||
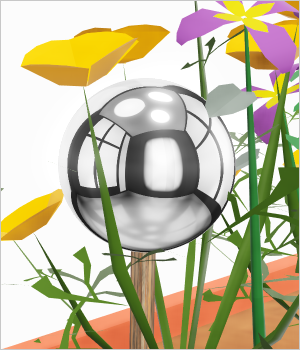
Skybox: Off, Lighting Environment: Default The default Lighting Environment of pCon.planner is reflected. |
Skybox: Default or Custom, Lighting Environment: Default The default Lighting Environment of pCon.planner is reflected. |
||
|
|
||
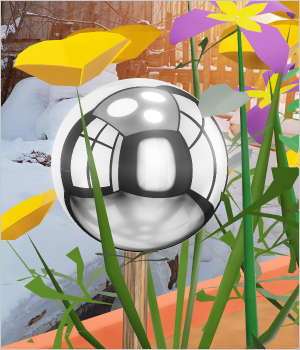
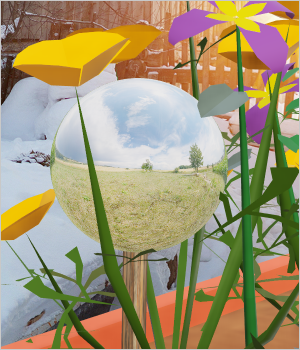
Skybox: Default or Custom, Lighting Environment: Custom and identical with Skybox The user-defined Lighting Environment is reflected. Note: If Lighting Environment and Skybox are identical, this can - in some cases - be used to get realistic reflections. However, the color of the light from the Lighting Environment can influence the atmosphere and the colors in the planning in an unwanted way. |
Skybox: Off, Lighting Environment: Custom The user-defined Lighting Environment is reflected. |
||
|
|
||
Skybox: Default or Custom, Lighting Environment Custom and different from Skybox The user-defined Lighting Environment is reflected. It does not match the Skybox: Reflexions and background are not compatible. |
|
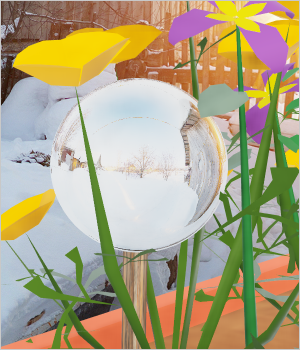
Note: The objects in the planning are NOT mirrored in the real-time display in reflecting surfaces. Only the lighting environment is always mirrored.
Background and Reflection in Fotorealistic Rendering
Hints for creating photorealistic images with the Image dialog (Presentation tab):
•Images created with the View setting behave as described in the previous section.
•In photorealistic rendering, the objects in the planning process - furnishings, drawing elements, images, etc. - are correctly reflected in reflective surfaces.
•Background images behave differently when it comes to reflection Read more in the chapter Photorealistic Images.