Split Room
Split Room has been developed to assist in designing the areas of a room in 2D. The areas achieved with Split Room can be provided with their own floors and ceilings and then with the desired colors and materials.
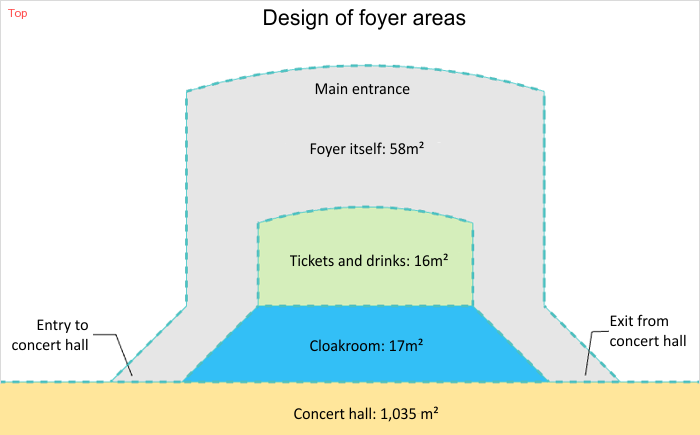
Example below: The design is for an concert hall foyer and the Split Room tool has been used. Different areas were drawn, each of them given a floor and then a different color. Then the area of each individual section was measured using the Room Stamp.
Note: Room slits can either be drawn into closed rooms or as adjacent elements to single walls. They can also be used independently from rooms. |
|---|
Using Split Room
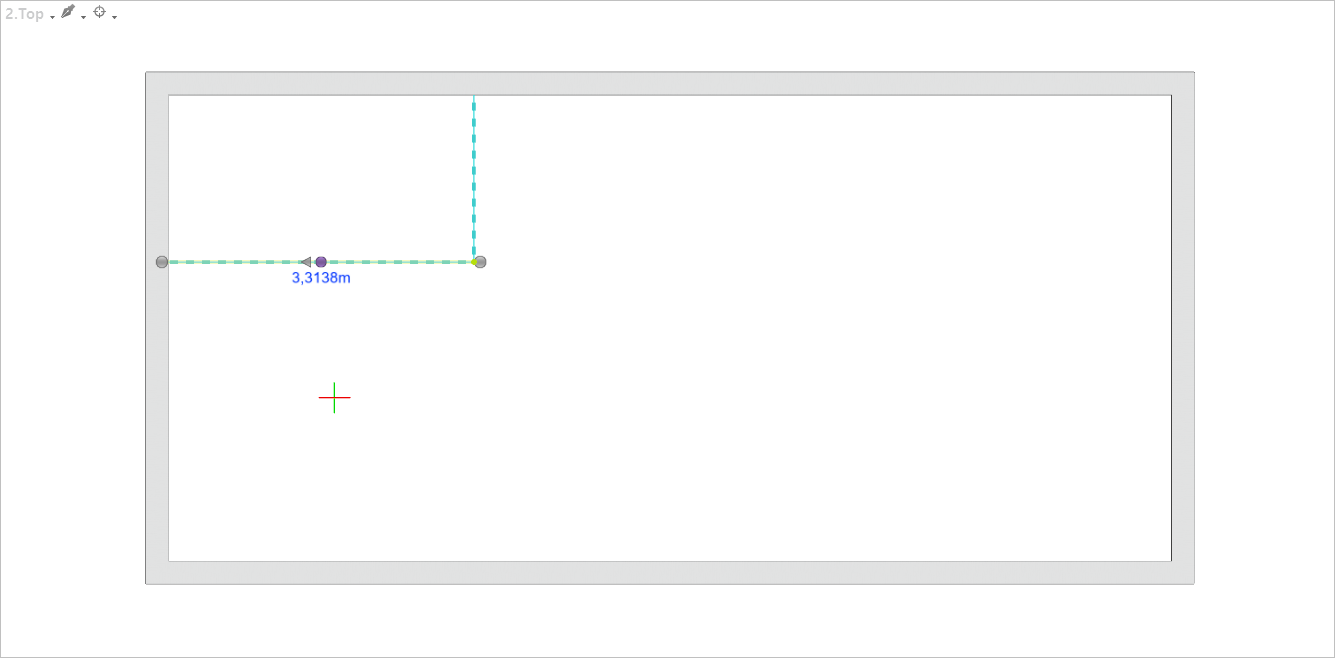
1.Change over to the Room Elements group, Start tab, and open the menu by clicking on the downward pointing arrow. 2.Click on Split Room. 3.Go into the viewport and click to establish the start point for the first line of the room split. 4.Now set the angle and length of the first line either by moving the mouse or entering the figures on the keyboard. 5.The first line will be fixed if you click the mouse again or use Enter to confirm the values typed in. 6.This drawing operation can be repeated as often as you like. The end of the line just drawn will always be the start of the following one. The tool will remain enabled until Esc is pressed or the Cancel item from the context menu is selected. |
Editing a Room Split
|
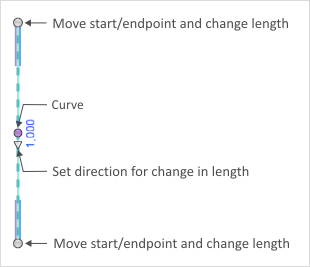
When a room split line is selected, various interactors become visible. They enable you to modify the length of the line, the curvature and the direction of a change in length. The object interactor will not appear when room split lines are selected individually. The use of the interactors is similar to that for walls, so please refer to the relevant sections. |
Using the Room Split to create an Opening within a Floor
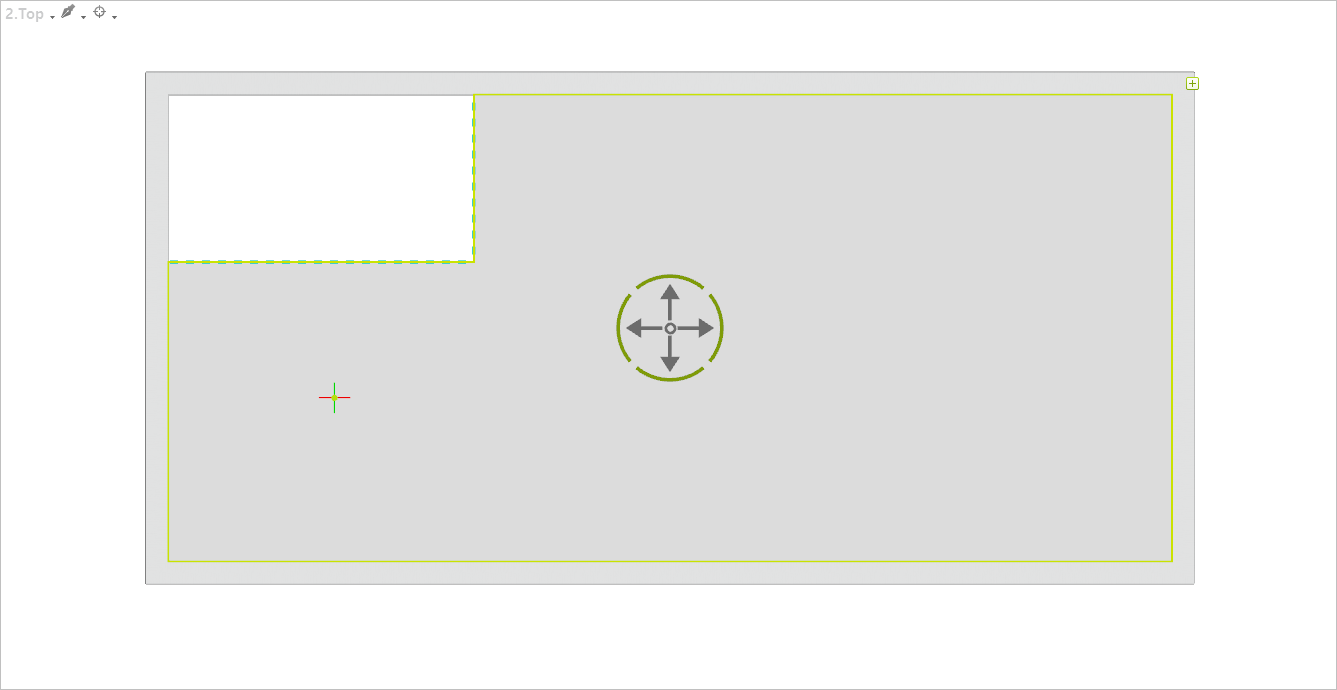
Openings in the floor are required, for example, to create a gallery or a staircase. These openings can be created with the Room Split.
To do this, create the Room Split before the room has a floor. To create an opening, the Room Split has to be adjacent to at least one wall in a way that the opening pre-drawn with the Room Split builds a closed form with this wall. You can create it this way by creating multiple splits. If you then insert the floor into the room, the opening is created automatically.