Angle Dimension
pCon.planner offers dimensioning of angles using either three points or two lines. The latter is particularly suitable if there are no details on the intersection point of the angle.
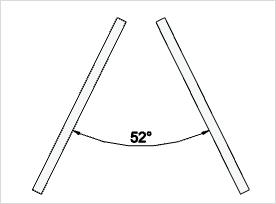
The following images show the application of the tool for dimensioning the angle using three points (left-hand image) and two lines (right-hand image).
|
|
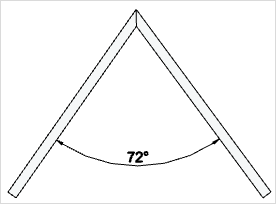
Using Angle Dimensioning With Three Points
1.Click on the 2.Now click to set the angular point. 3.Two more mouse clicks enable you to define the successive arms of the angle. 4.Then the angle dimension will be seen and can be moved around with the mouse, then fixed with a click. 5.The angular dimensioning tool will stay active so that you can dimension as often as you like. To cancel, either press Esc or select Cancel from the context menu. When setting the intersection point for the angle or the two points on the arms, you can make use of an object’s Snap Points. To make alterations to dimension lines already created, select it and then click on the |
Using Angle Dimensioning Between Two Lines
1.Click on the 2.Two further clicks allow you to establish each of the angular points necessary to use of the tool. To set them, it is possible to make use of an object’s Snap Points. 3.Then the angle dimension will be seen and can be moved around with the mouse, then fixed with a click. Unlike angular dimensioning using three points, this completes the process. To make alterations to dimensionings already created, select it and then click on the |