Content of Viewports
To highlight certain objects or sections of a design, the rendering can be specifically influenced in viewports: a selection can be transferred into a window from the design area or the layer functions as well as Hide Selection/Unhide can be used in order to display only a selection of objects.
Transferring a Selection to the Layout
This is how to display a selection from your design within a Layout Viewport:
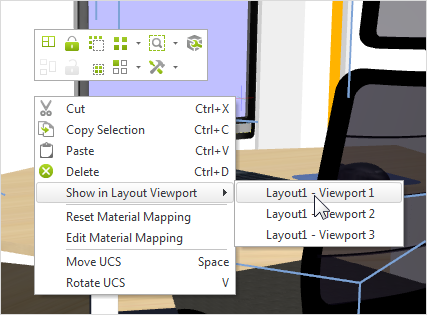
1.First set up viewports for the Layout, then switch to the design area. 2.Select those design elements and 3D models from your drawing that you wish to display in the Layout area. 3.Open the context menu with the right-hand mouse button. Now select the Show in Layout Viewport menu item. 4.A further menu will open up listing all viewports set up so far. 5.Select the Viewport you want. 6.Switch back to the Layout area. |
|
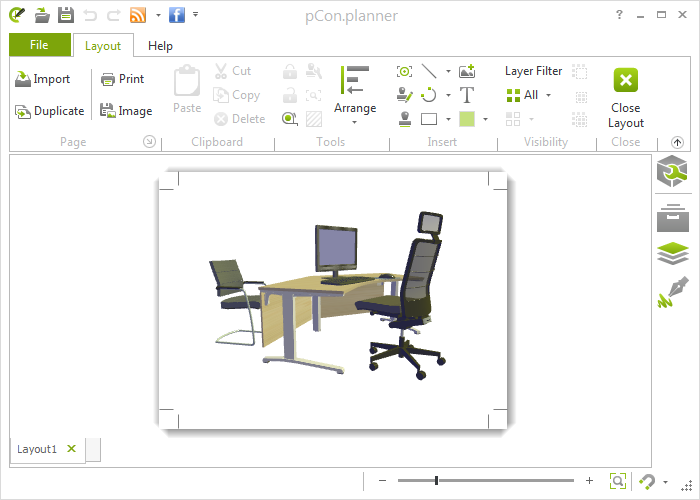
The design elements previously selected will now be displayed in the chosen Viewport.
Layers can, as in the design area, be specifically controlled. Besides the Layer dialog (Toolbar), which contains a full list of all layers within a design, there are the layer filters both for the whole Layout (i.e. on a global basis) and for the currently active viewport.
As well as visibility management in the Layer dialog and in the Layer Filter, there is the possibility of hiding or unhiding specific individual objects in the design by means of the entries in the View group on the Layout tab. This option is possible in interaction mode.
|
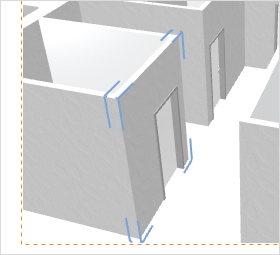
Double-click on the relevant window to activate the interaction mode. After this it is possible to mark objects with a single mouse click as customary in the design area (see red dotted frame in screenshot on left). Once the object has been selected you can specify the visibility by using the items Hide Selection, Hide Others and Unhide. The hiding and unhiding of objects always refers to the content of the active viewport. In all other viewports, visibility will not be affected. |
Note: Some objects (like 2D drawing elements) have to be grouped before hiding them. To group these, go to the planning area, select the object and click the Group option on the Edit tab.
Clippings as a means to control visibility can be integrated in your Viewports in two possible ways:
Use Clipped Views from Planning Area via Assign Visibility
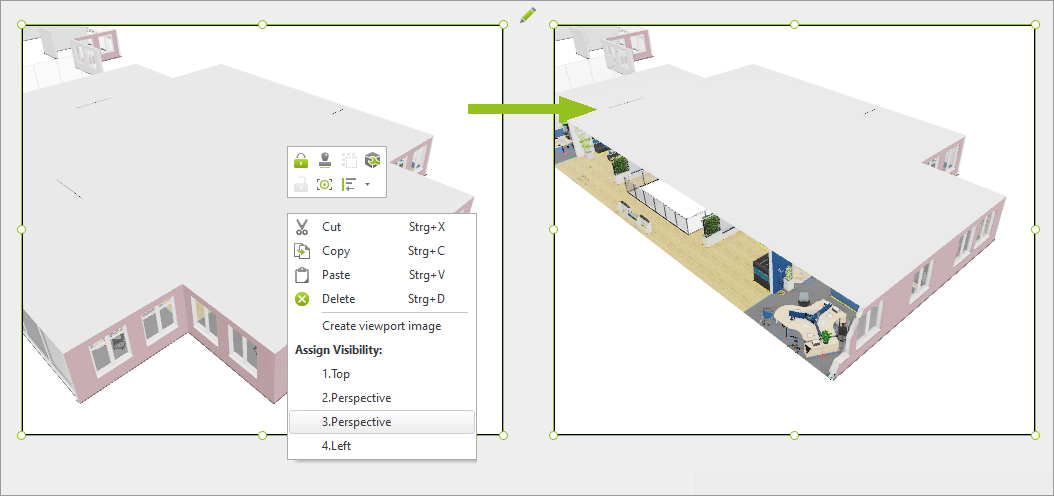
1.Select a viewport.
2.Right click to open context menu.
3.Under Assign Visibility, select the view from the planning containing the activated clipping you want to display in your viewport.
4.The clipping will now be visible in your viewport.
The clipping can be edited, deactivated and reactivated as well as deleted via the Clipping menu on the Layout tab.
Create a Clipping in a Viewport
1.Select a viewport.
2.Open the Clipping menu directly on the Layout tab.
3.Select one of the three clipping modes.
4.Place your clipping by means of its interactors.
5.Double click or press Enter to create the Clipping.