Clipping
Note: On our Youtube channel you will find a video on this topic |
||
|
|
Thanks to the new tools for creating clipping planes, the boundaries of visibility control in pCon.planner are being redefined: focus visually on a section of a complex drawing or provide insights into a specific area of the planning - regardless of object boundaries. Learn more about creating slices for planning and layout (PRO) in this video tutorial. |
Clipping defines boundaries of visibility. All parts of objects, articles and architectural elements that are located in front of the Clipping planes are hidden.
Layer Filter as well as Hide Selection alter the visibility of whole objects, while Clipping splits single objects into visible and invisible areas. This way it becomes possible, for example, to hide one half of a wall in your planning.
Clippings are used to:
•Make a part of your planning accessible for further editing
•Create more clearness in your media files (like panoramic images, photorealistic images…)
•Set the focus to a certain part of interior or architecture
•Enhance performance while editing large drawings (invisible parts of a drawing do not have to be calculates)
Clippings are saved to the DWG and are still available when reopening the file. |
|---|
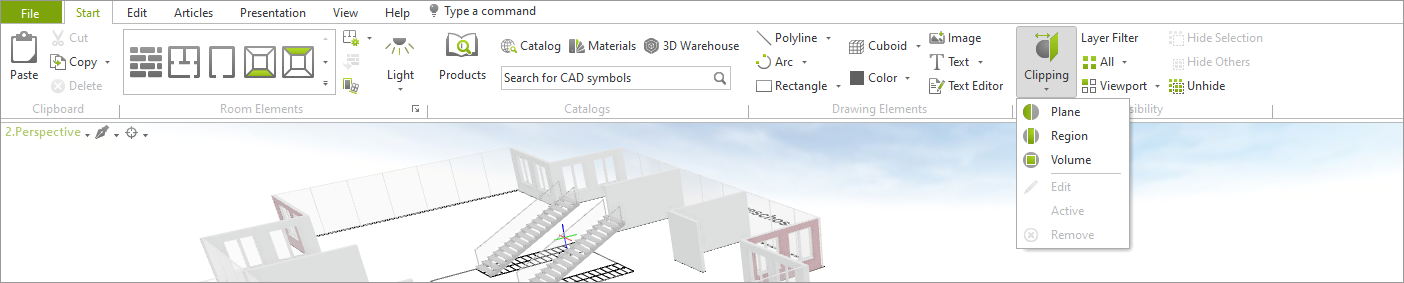
The Clipping menu is located on the Start tab, Visibility group.
|
The following options can be accessed from the Clipping menu: |
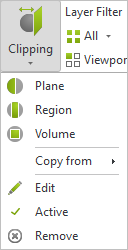
Clipping Modes |
|
The complete drawing is clipped along a selected plane; all parts of the drawing on one of the sides of this plane stay visible. |
|
All the parts of the drawing that are located within an individually defined frame stay viewable while all objects outside this region are clipped. |
|
Limits visible area from six sides; here, all object parts that lie outside the volume are cut off. |
|
Edit Clippings |
|
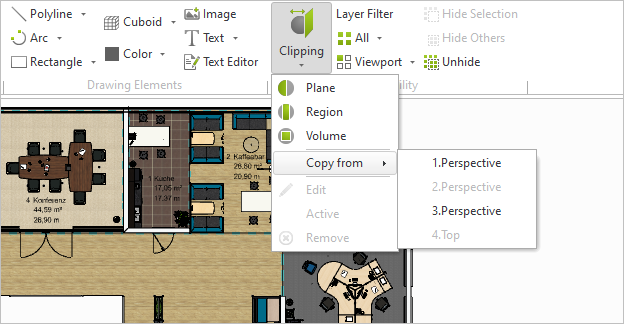
Copy from |
Copy Clipping from another viewport. |
Edit |
Edit the Clipping in your active viewport. After clicking Edit, the Clipping is displayed in the active viewport and can be moved or modified. Changes to the Clipping in other viewports affect the visibility in the viewport for which the Clipping was originally created. |
Active |
Display or hide the Clipping in the active viewport. |
Remove |
Delete the Clipping from the active viewport. Note: The original Clipping is automatically removed if you create a new Clipping in your active viewport. |
Clippings are controlled by activating viewports (workspaces); new clippings are automatically inserted to the active viewport. In order to edit, de-/activate or remove a Clipping, the viewport containing this Clipping has to be active. |
|---|
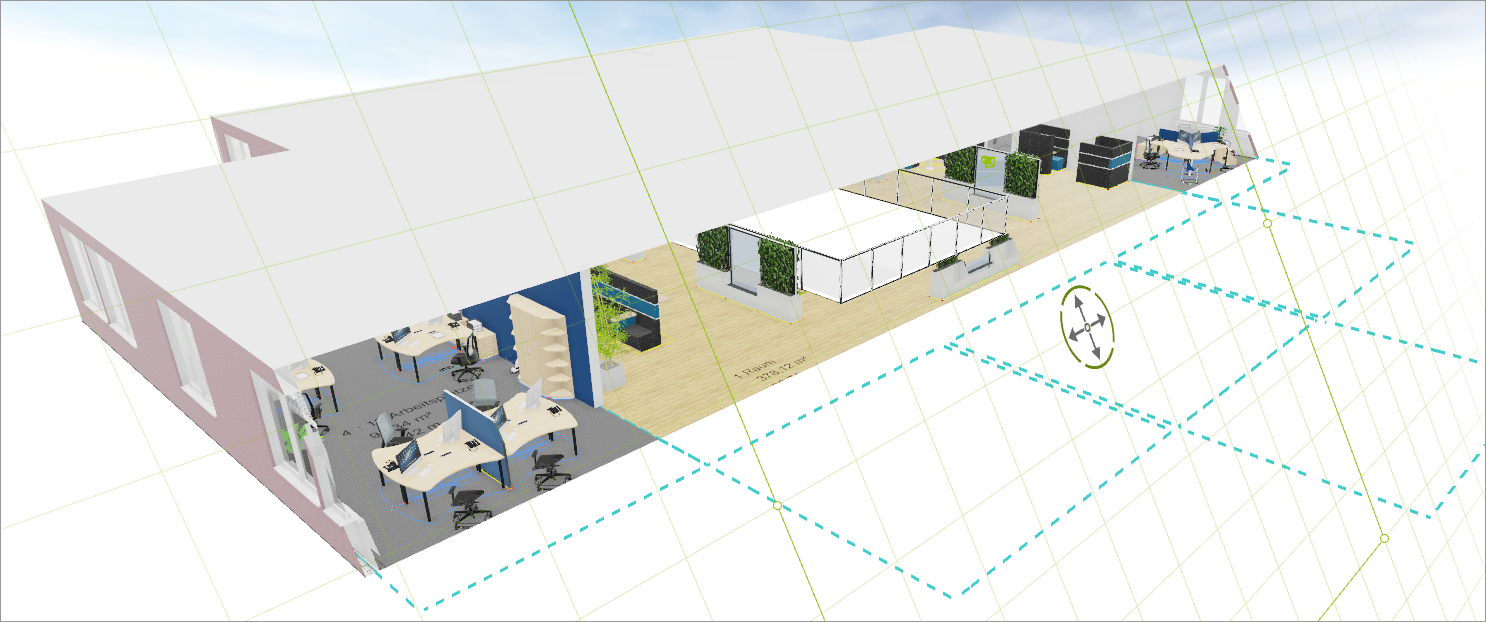
Visibility of a clipping while navigating and planning: Each Clipping is visible in the viewport that was active while the Clipping was being inserted.
Visibility while editing a clipping: All viewports can be used to edit a Clipping. While a Clipping is inserted or edited, the green highlighting becomes visible in all viewports. This makes it easy to move or edit the Clipping.
Changes will only take effect in the viewport in which the Clipping was created.
Clippings are displayed in most of our standard Render Modes: Wire Frame, Hidden Line, Colored, Textured as well as Realistic.
They are not available when in Shaded mode.
Using the three clipping modes
The insertion of the three different clipping modes Plane, Region as well as Volume is explained on the respective pages.
1.Define a Clipping in at least one of your viewports.
2.Activate the viewport in which you also want to apply this clipping.
3.Open the Clipping menu (Start tab) and click Copy from.
4.Pick a clipping from the menu.
It is also possible to adapt a Clipping from the working area into a Viewport on your Layout page.
Clipped scenes can be shared via a wide range of image exports. They are visible in the following image types:
•Photorealistic images and panoramas
•Images and panoramas rendered with OpenGL
•Vector images
•PDF exports from the Layout area
The Clipping tools for hiding parts of your drawings can be integrated in your layouts in two ways:
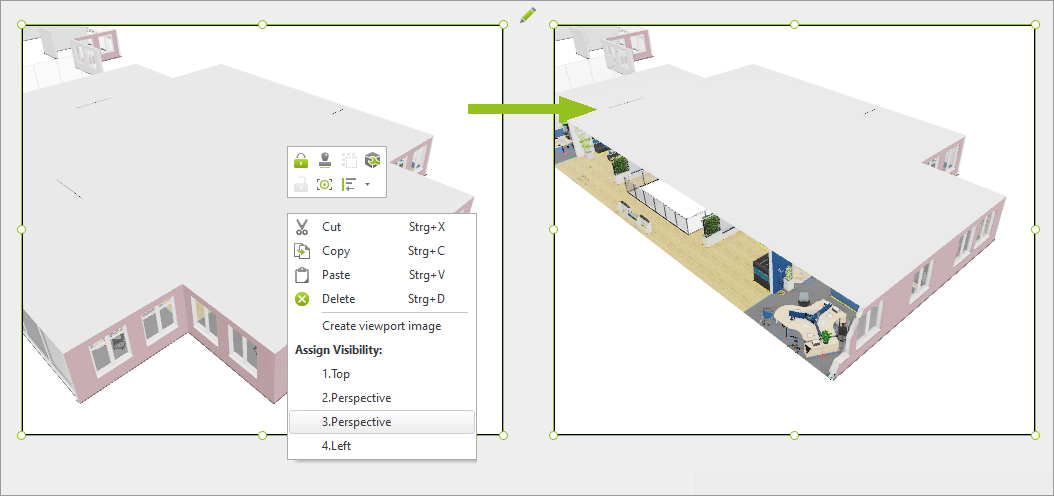
1.We recommend to use clipped views from the planning area in the viewports on your pages by Assign visibility (context menu, opened with right click on an active viewport in the Layout area).
2.Alternatively, define a Clipping for the contents of a viewport directly in the Layout area (select viewport > Clipping menu).