Grid Ceiling
This chapter encompasses the different options for creation and modification of grid ceilings.
|
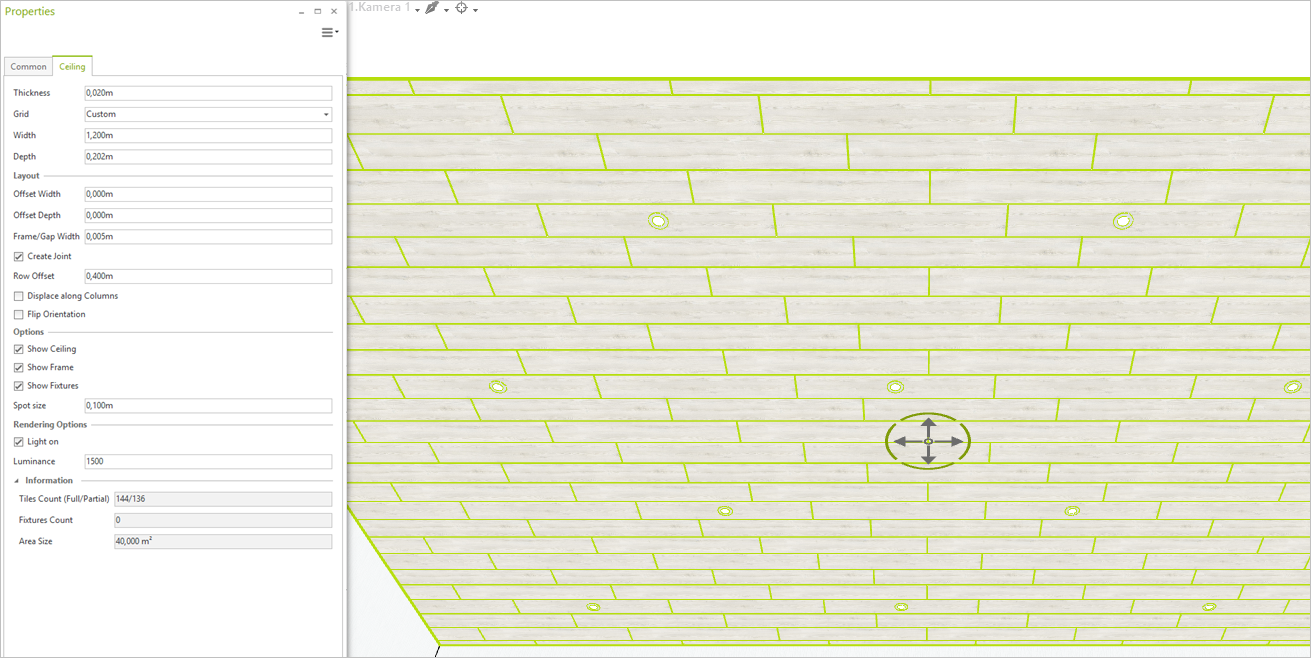
The grid ceiling options allow you to create a customized ceiling design. The image on the left shows ceiling panels created on base of the grid options and ceiling elements. |
Switch Ceiling Type to Grid Ceiling
1.At first, create a ceiling, as explained here.
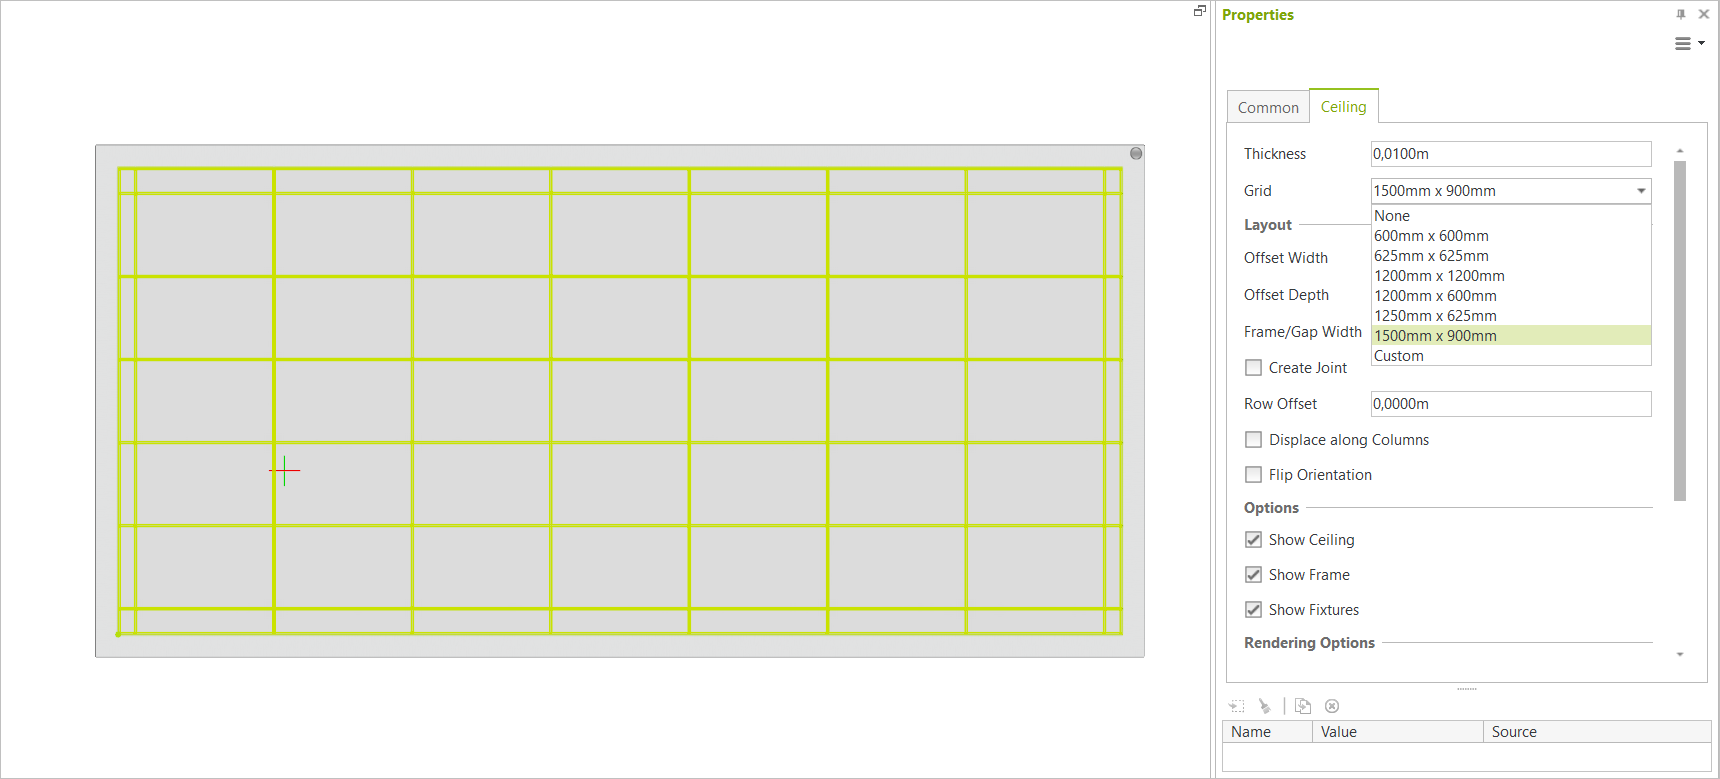
2.In the Properties Editor, use the Grid drop-down menu to select one of the grid options or enter custom numbers. The grid is added to the ceiling.
Edit Grid Ceilings
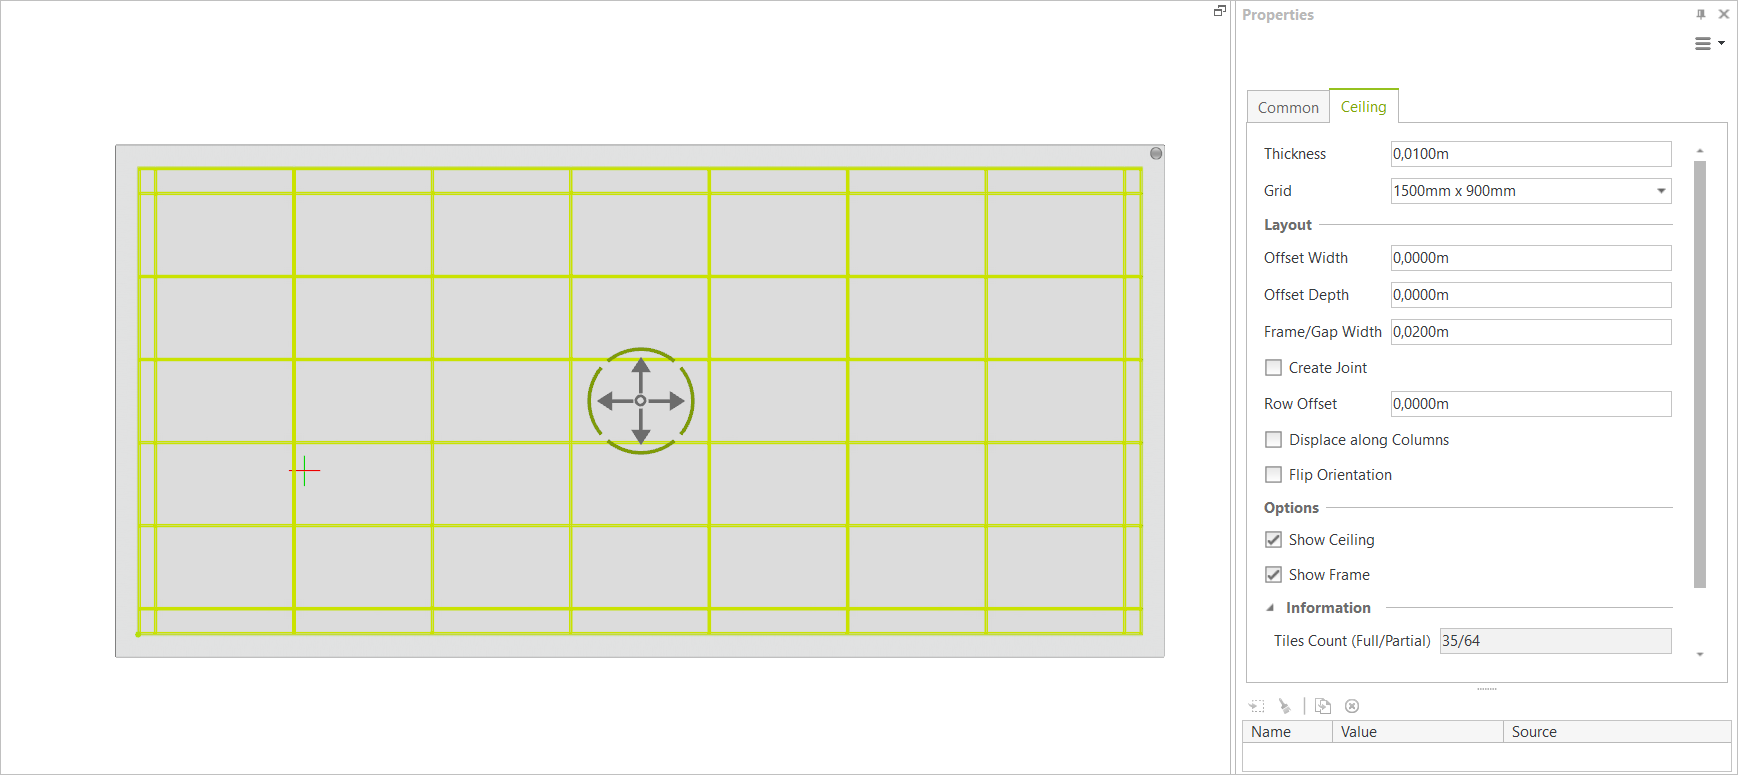
Note: Grid ceilings become visible in the Top view after clicking the edit icon ( |
|---|
Properties of Grid Ceilings |
Impact |
Modification via |
Grid |
Change width and depth of the grid |
|
Offset Width |
Determines where the complete panels start in relation to the wall |
Properties Editor |
Offset Depth |
Determines where the complete panels start in relation to the wall |
Properties Editor |
Frame/Gap Width |
Set the frame width between the panels |
Properties Editor |
Create Joint |
Activate to create joints instead of frame structure |
Properties Editor |
Row Offset |
Define the offset between the rows |
Properties Editor |
Displace along Columns |
Reverses the direction of the offset |
Properties Editor |
Flip Orientation |
Reverses the alignment of the panels |
Properties Editor |
Show Ceiling |
Show/hide ceiling while grid is still displayed |
Properties Editor |
Show Frame |
Show/hide frame/joint structure |
Properties Editor |
Adding Ceiling Elements to a Grid Ceiling
If you open a grid ceiling by clicking the edit icon (![]() ) or with a double click, the dynamic tab Ceiling System will open.
) or with a double click, the dynamic tab Ceiling System will open.
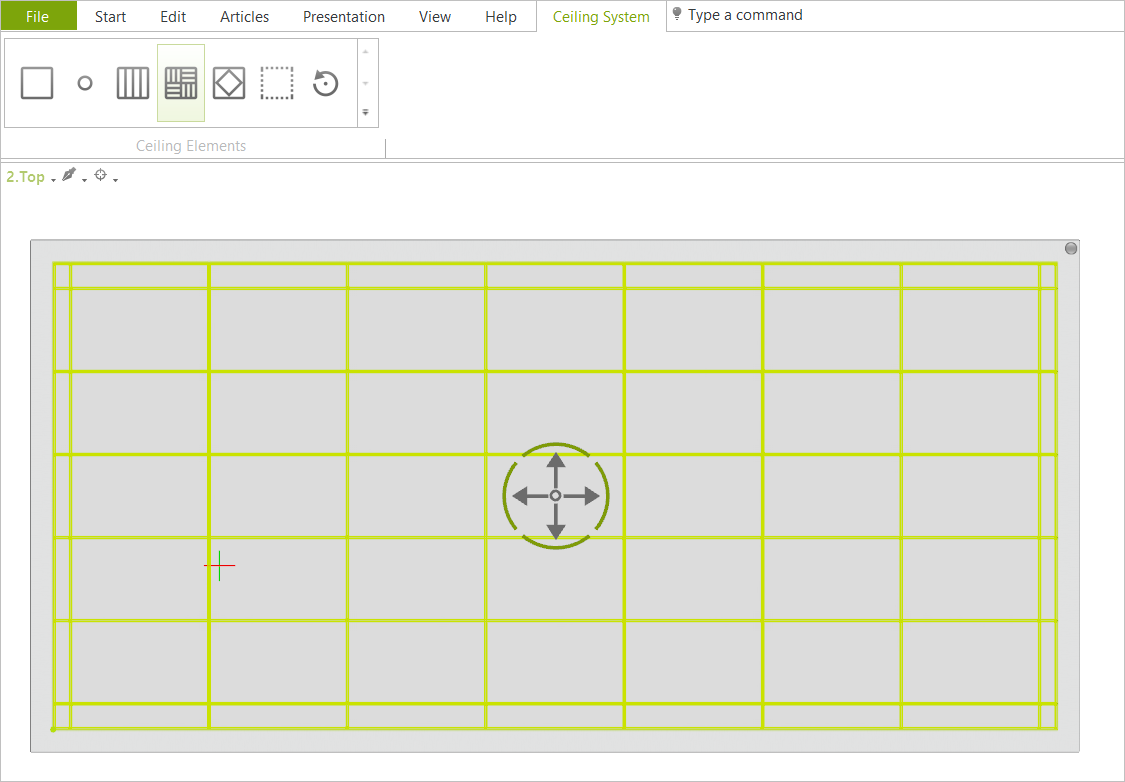
Click on the downward-pointing arrow on the menu to display the names of the respective elements:
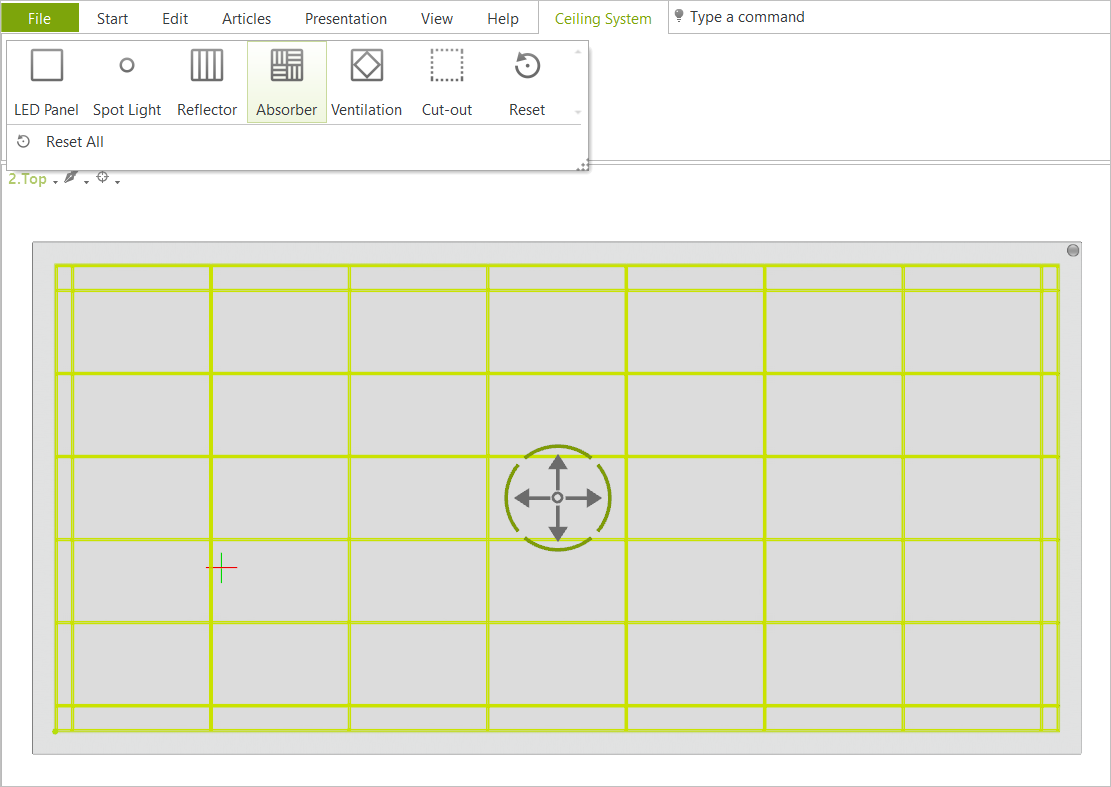
Isert Ceiling Elements
The following elements can be added to your ceiling:
•LED Panel
•Spot Light
•Reflector
•Absorber
•Ventilation
•Cut-Out
Note: When using the element type Reflector, make sure that your ceiling has at least a thickness of 8 cm. The luminous material used for reflectors is not visible on thinner ceilings. |
|---|
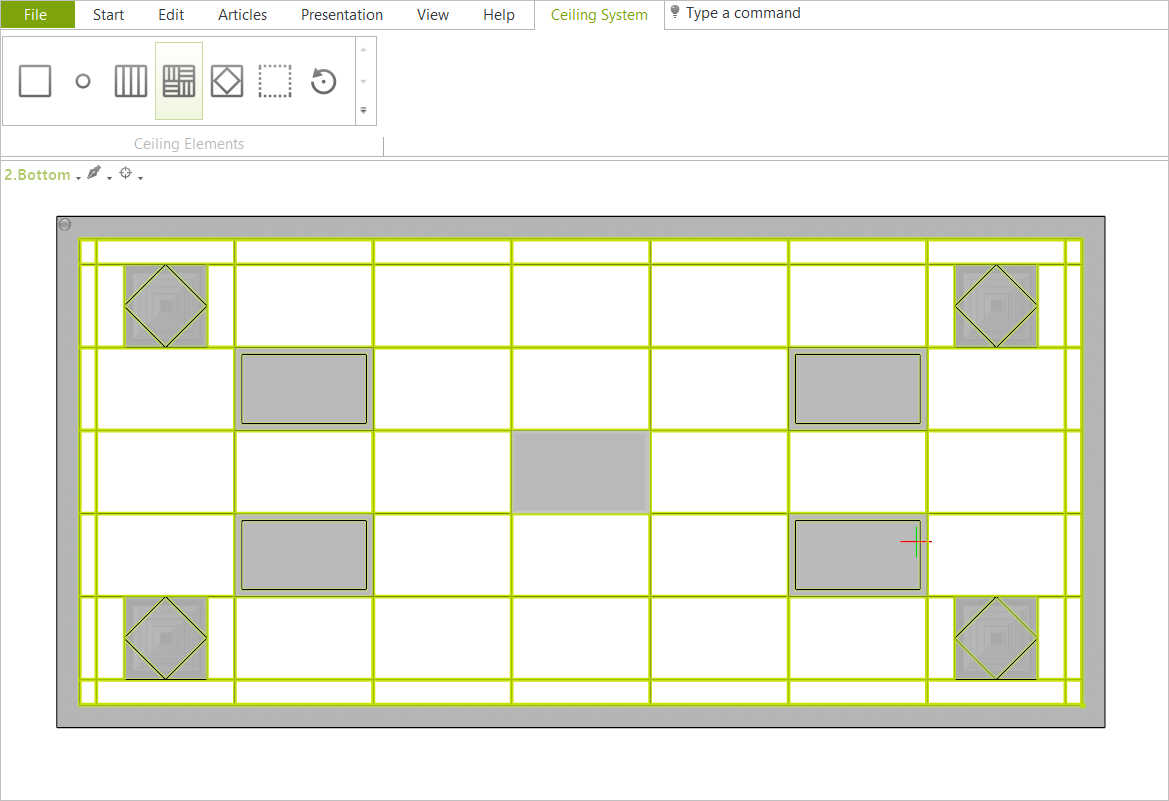
How to insert elements.
1.Open the grid ceiling with a double click in order to edit it.
2.Select the desired element type from the Ceiling System tab.
3.Click to place the element on the desired ceiling tile. Per click, one element is placed. The insertion of an element type can be continued as required. The insertion process ends when another ceiling element is selected from the Ceiling System tab or the action is completed by pressing ESC.
You can place as many tiles as you like and change the ceiling element type as often as you like. If you have placed an element incorrectly, you can undo the placement by either clicking
•on the element while the same element type is selected in the tab (the tile is then empty again)
•or by selecting a different element type in the tab and clicking on the tile again (the ceiling element placed in the tile is replaced by the new type).
Please note that, depending on the selected grid, several placement options are available for each ceiling tile (centered or offset to one of the edges). The blue placement marker shows the future position of the ceiling element.
Resetting Ceiling Elements
There are three ways to reset the assignment of tiles with a ceiling element:
1.Click on the tile while the element installed in it is selected in the Ceiling System tab: Deletes the content of the clicked tile.
2.Reset function, Ceiling System tab: Deletes the assigned content for each click on a tile.
3.Reset All, Ceiling System tab: Deletes the elements from all tiles in the selected ceiling at once.