Ceiling
One of the additionals that you can plan is ceiling. As in the case of floors, the ceilings can be designed for individual rooms or for a complete suite of rooms. Ceilings cannot be planned unless the walls have been joined up.
How a ceiling is drawn is demonstrated by an example. The best projection for making ceilings is Perspective.
|
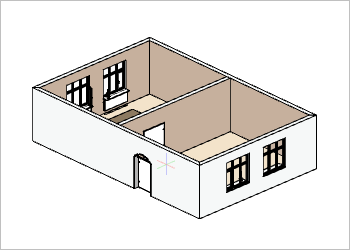
1.Change over to the Room Elements group, Start tab, and openand open room elements by clicking on the downward pointing arrow. 2.Now click on Ceiling. 3.You have the choice of creating a ceiling for one of the rooms (a) or for both rooms at once (b). |
|
a)Move the cursor over the area of one room. The outlines of the room will turn red, thus marking the size of the ceiling to be created. |
|
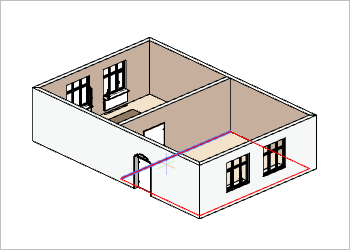
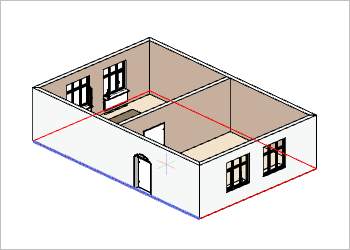
b)Move the cursor over one of the external walls (left-hand image). A red outline will appear around the whole ceiling area for both rooms at once. This area represents the size of the ceiling area to be created. 4.One of the room sides will be marked in blue. This marks the direction of the wall (needed for the positioning of ceiling grids). Move the cursor to change the wall direction. |
|
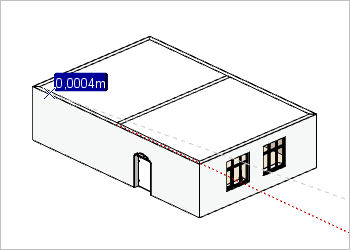
5.The ceiling is inserted following the next click. Now, determine how thick the ceiling is to be by moving the mouse or typing in the thickness. 6.This is again fixed by a mouse click or by pressing Enter. |
To insert yet another ceiling, simply press the F2 function key.
It is possible to adapt ceilings to architectural changes in the design such as Partitions or Room division. You can use the Scale tool to modify a ceiling. Via the Properties Editor, ceilings can furthermore be converted into grid ceilings and edited further.
Afterwards, the thickness of the ceiling can be adjusted using the Properties editor.