Photorealistic Images
Note: On our Youtube channel you will find a video on this topic |
||
|
Your renders just don't look the way you expect them to? Starting from the correct texture alignment to the lighting and the right perspective into the room, this video will show you how to make your renderings more realistic! |
|
Besides creating real-time displays, it is possible to create pictures resembling real photographs – called renderings. For the renderings, all visible objects in the current projection will be included in the computation for the image. The only exceptions are the symbols representing Cameras and Lighting.

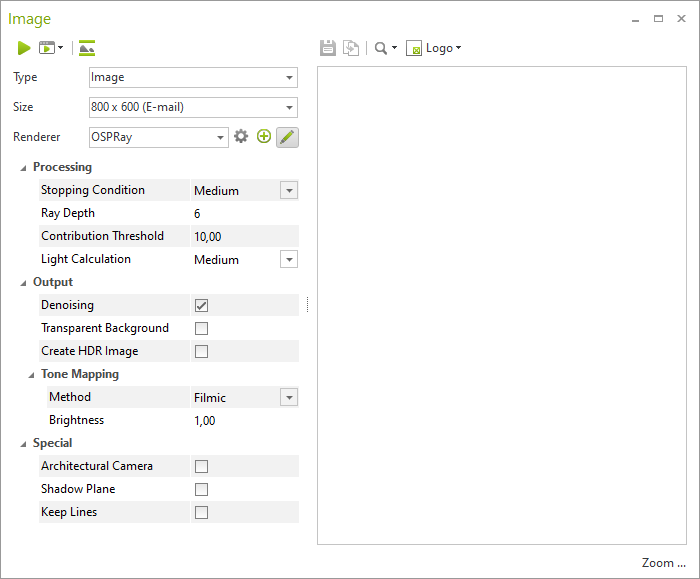
1.Please start the Image dialog by clicking the Image button in the Create group, Presentation tab.
2.Under Type, select the Type of Image you would like to create.
3.Set the resolution using the Size drop-down menu. By choosing the User Defined item, you can set your own resolution.
4.Select OSPRay from the Renderer selection box. If you click on the pencil icon you will obtain access to enhanced rendering options, which are described in detail in the table on OSPRay.
5.Now click on the Start button to start the rendering process. This will take a varying amount of time depending which profile has been selected or setting made.
The image is displayed in the Image window. Here you can enter whether you want to save your image (use the Save As button) or copy it into the clipboard (use Copy Image). There is also the possibility of inserting and positioning a Logo in the image. More on this is to be found here. During the render process, a Stop button will be visible on the left side of the Image window. By means of Stop, you can cancel image computation at any point you want.
Environment Settings and Reflections in Photorealistic Rendering
The skybox and lighting settings from the dialog Environment affect the photorealistic rendering:
•A user-defined background image (Environment dialog) will automatically be used for image calculation with OSPRay. The background image is not processed during the image calculation. As with a collage, it lies behind the scene and is visible in transparent image areas (like windows etc.). The background itself does not emit light and is not visible in reflective surfaces.
•If an image is used as lighting environment (Environment dialog), the light color will be taken from the image if rendering with OSPRay.
•If an image is stored as Lighting Environment in the Environment dialog, this image is reflected in reflective surfaces. Please make sure that the background panorama and the image for the light background match for rendering.
