Real-Time Images
A real-time display is a depiction of the design in any kind of projection and rendering. All objects and symbols (such as symbols for cameras and lights) which have been set as visible in the plan will be included in this display. You can use the Layers dialog, the Layers filter and also Hide and Unhide selections to determine which objects are to be visible in the resulting image.
There are several ways of capturing a real-time display in pCon.planner, which are described here.
1.First set the projection and rendering you have in mind. 2.Open the Copy menu in the Clipboard group on the Start tab. 3.Click on the Copy Image button. Now an image of the objects in the current viewport will be created and sent to the Windows clipboard. 4.Use the keyboard shortcut Ctrl + V to paste the image into a graphics application or into pCon.planner itself. |
Use Image Dialog to Create a Single Image
The second way of generating a real-time display is to use the Image button, Create group, Presentation tab.
1.The Image dialog will launch.
2.Under Type, select the Type of Image you would like to create.
3.Set the image size you require using the Size drop-down menu. By clicking on the User Defined item you can also set your own figure for the size.
4.The next drop-down menu, Renderer, enables you to select OpenGL. There are further options for settings if you click on the pencil icon in the upper part of the dialog.
5.Now click on the Start button to generate the real-time display.
6.You will see your image on the right side of the dialog.
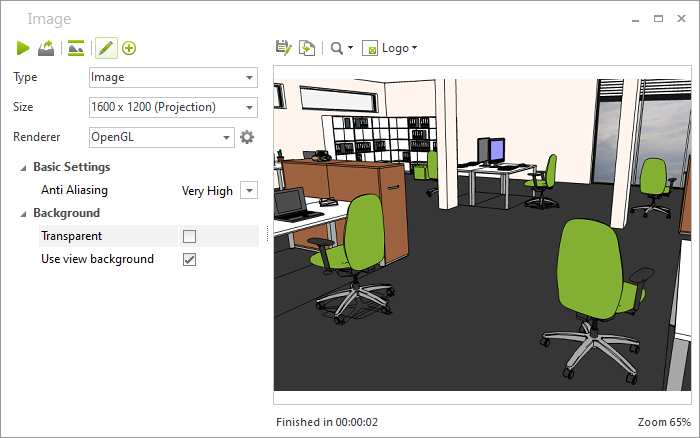
You can save your image (use the Save As button) or copy it into the clipboard (use Copy Image). There is also the possibility of inserting and positioning a Logo in the image. More on this is to be found here. Use Image Dialog to Create Multiple Images You can also export multiple images of your plan by means of the Image dialog: 1.Open the Image dialog. 2.Under Type, select the Type of Image you would like to create: Image or Panorama. 3.Set the image size you require using the Size drop-down menu. By clicking on the User Defined item you can also set your own figure for the size. 4.The next drop-down menu, Renderer, enables you to select OpenGL. There are further options for settings if you click on the pencil icon in the upper part of the dialog. 5.Click the Export button. 6.This will open a menu where you select the multiple cameras and views you want to export. 7.Click Export, set a directory and click OK. |