Single Frames
Below we describe the general functions and settings for image creation. You can find the specific options for the rendering of real-time displays and photorealistic images in their respective sections.
The Image dialog, opened by clicking on the button Image in the Create group, Presentation tab, is the main calculating tool for real-time images, photorealistic images, Multi Content Pictures, Multi Content Panoramas and panoramic images. A click on Image opens the following dialog:

The upper part of the dialog contains features that are of relevance for the calculation of images as well as videos.
The following table contains a description of the different buttons within this dialog:
|
The play button starts the computation process. |
|
Clicking on the button (in pCon.planner Pro) exports the settings you have made for the computation of a single frame rendering or Animation for external calculation. You can send single images and panoramas with this button to the Batch Rendering tool. Using the button, you can select whether you would like to export the current view or a camera-view for the external rendering. |
|
Clicking on this button reveals a frame that marks the image area in the active viewport. The area shown in grey will not be taken account of when the output medium is generated. The image area button is available for the computation of images and videos. |
|
The pencil icon will open further setting options for the respective Renderer. |
|
By clicking this button, you can save individual advanced settings as a new profile. You can then name the profile and decide whether you would like to use it as your default profile for rendering. |
|
Here you can open a menu to select profiles for rendering. For more information on render profiles, see below. |
|
Click on this button to determine the save location and file type for your result. |
|
This button copies the current image to the clipboard. |
|
Opens a drop-down menu with zoom options for the current image. |
|
Opens a menu for inserting and positioning a logo. You can read more about this option below. |
|
Uploads content to cloud service and opens Share dialog. |
|
Opens Share Settings dialog. |
You can find render profiles in the Image dialog to the right of the Renderer selection. The selected Renderer determines which profiles are available.
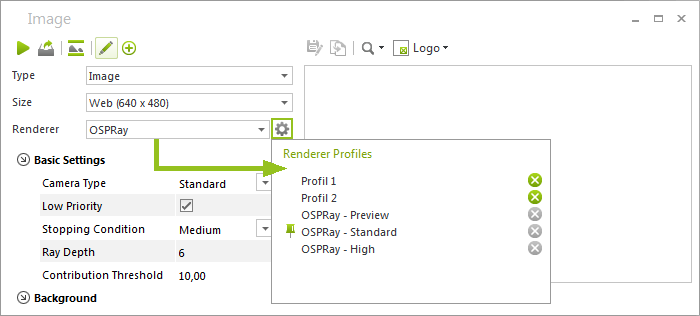
You can use render profiles independently from your current plan. To create a new Render Profile from your current settings, please click the plus symbol (![]() ). The new profile will be saved under c:\Users\Username\EasternGraphics\x3g_renderprofiles\. It is now permanently available in pCon.planner. You will find it in the menu opened by a click on the cogwheel symbol in the Image dialog (see image above).
). The new profile will be saved under c:\Users\Username\EasternGraphics\x3g_renderprofiles\. It is now permanently available in pCon.planner. You will find it in the menu opened by a click on the cogwheel symbol in the Image dialog (see image above).
Depending on the selected renderer, you can choose from various pre-defined profiles for photorealistic visualizations and real-time images. Choose a profile depending on the desired image quality.
By clicking to the left of the profile name, you can set a profile as default. To delete individual profiles, click on the cross found on the right.
OSPRay – Shadow Plane
If you activate this profile, a transparent plane will be inserted on the zero level. It will create realistic shadows for 3D objects placed directly on it.
The drop-down menu Type within the Image dialog includes options to generate a default image,a Panorama or a Multi Content Picture. Both real-time displays and photorealistic images can be created as Panorama, as Multi Content Picture or as Multi Content Panorama.
With the Logo button, you can insert, align and resize an image (e.g. a company logo).
![]()
1.First click on the Logo button. 2.Now click on the Open Picture icon within the Logo menu.. 3.In the dialog that opens, select a file you would like to use as Logo. 4.The Show Logo option in the Logo menu allows you to control whether the Logo is shown or not. |
![]()
5.You can decide not only the size of the Logo but also its position and its distance from the edge (see next illustration). The Transparent option also enables you to use the transparency employed in the graphics. |
![]()
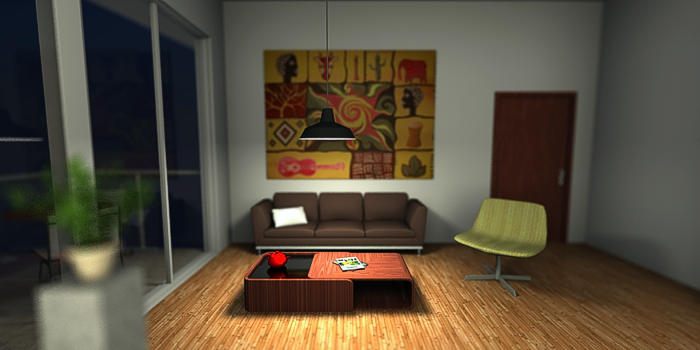
Below there is an example of the use of a Logo in a rendered image. Logos activated via Show Logo will also be visible in your images rendered with the Batch Rendering service.
![]()
If the Depth of Field option is enabled for a Camera and given the appropriate settings, its effects will be visible in the photorealistic rendering.