Hatch
The Hatch tool allows you to assign hatching to a closed Drawing element or a complete Line. An alternative way to add a hatching to drawing elements is the Filling option within the Properties Editor. There is more on hatching for walls here.
Assinging a Hatch Type
1.Mark the objects which are to receive hatching.
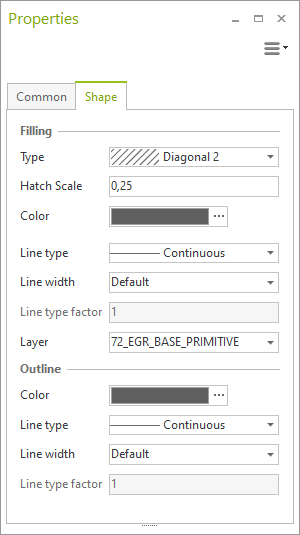
2.In the Properties editor, switch to the Shape tab.
3.Select the type of your hatch under Filling – Type.
The hatch is updated automatically when the object associated with it is changed in size or proportions.
Alternative way to create a hatch: Hatch button (Edit tab)
Drawing objects composed of several lines, freehand lines or 2D drawing elements composed of several lines, freehand lines or arcs can be hatched using the Hatch button on the Edit tab. Composite shapes must be closed in order to hatch them.
Difference between Filling and Hatch
The Filling area in the Properties editor provides different Filling types. These differ in their behavior:
1.Type Solid: a solid filling is part of the filled object and is by default moved together with it.
2.Hatch types: hatches are individual object. If the hatched object is moved, the hatch will not adapt automatically. To move the hatches together with the object, object and hatch have to be selected or grouped together.
Editing a Hatch Type
|
|
Properties |
Description |
Filling - Type |
Variety of hatch patterns |
Hatch Scale (not visible while Show 3D) |
Number of lines and the distance between them for line based hatches |
Linetype |
Selection of predefined linetypes (e.g. broken) |
Line Type Factor |
Definition of the size and distances between the segments of the linetype |
Linewidth |
Strength of the line |
There is more on line types and thicknesses here.
Visibility of fillings and hatches by render mode
Solid fillings are visible in all render modes except the Hidden Line mode.
Hatches are visible in all render modes.
